Concrete Curing Time: How Long Does Concrete Take to Cure?
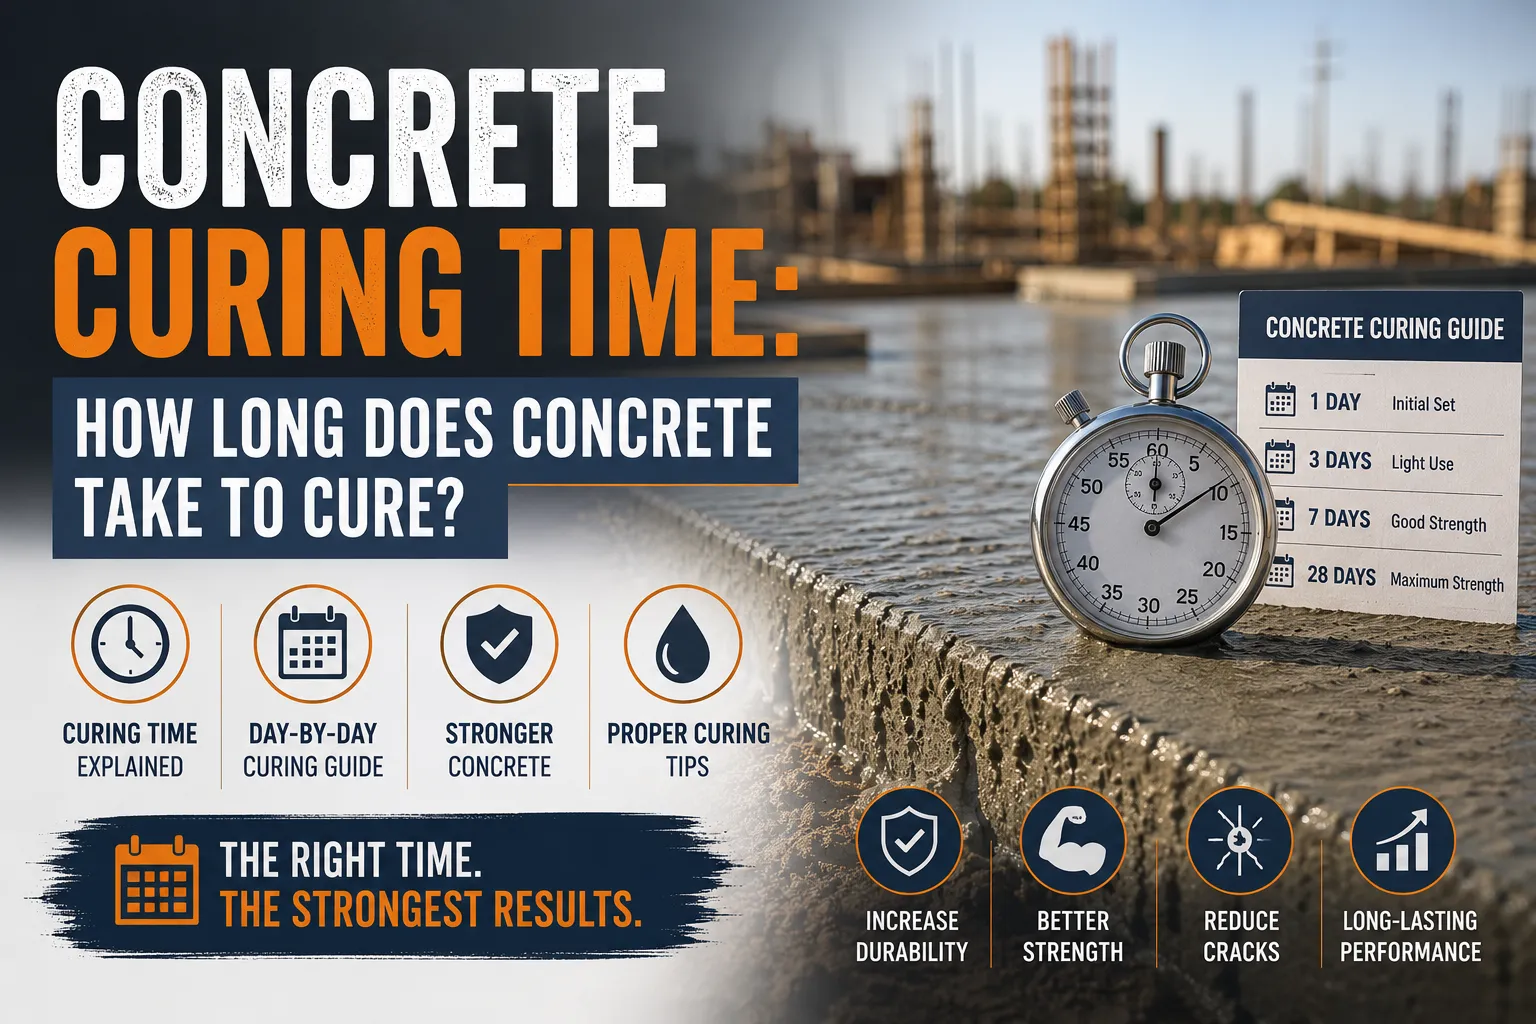
Concrete takes 28 days to fully cure. Foot traffic is safe at 24–48 hours, light vehicles at 7 days, and full structural loads at 28 days. Most people assume the job is done once the surface feels hard — but what happens inside the slab over those 28 days decides whether the concrete lasts 5 years or 50. A slab that loses moisture in the first 3 days can permanently lose up to 40% of its design strength — a 4,000 PSI (27.6 MPa) driveway effectively becomes a 2,400 PSI (16.5 MPa) slab that cracks, dusts, and spalls within a few years.
Curing is not drying. It is an active chemical reaction — hydration — where water and Portland cement (PC) form interlocking crystals that give concrete its strength. That reaction needs controlled moisture and temperature for the full 28-day period. Cut it short and the crystals stop forming. Nothing repairs that later. This guide covers the exact curing timeline, the 6 factors that control it, 4 proven methods, project-specific timelines, and a PSI-grade breakdown no competitor currently provides.
Concrete Curing vs Drying — The Exact Difference
Curing builds strength. Drying destroys it.
When water meets Portland cement (PC), hydration starts immediately. Calcium silicate hydrate crystals grow through the mix, wrapping around sand and aggregate, locking everything together. Your concrete gets stronger as those crystals grow — and they keep growing for the full 28 days, as long as moisture stays present.
Drying pulls that moisture away. Once the surface dries out, hydration stops. The crystals stop growing. Your slab reaches whatever strength it has at that moment and stays there permanently.
This is why contractors keep the surface wet after pouring. It is not about adding water to the mix — it is about keeping the curing reaction alive long enough to reach full strength.
Concrete Curing Time: Full Stage-by-Stage Timeline
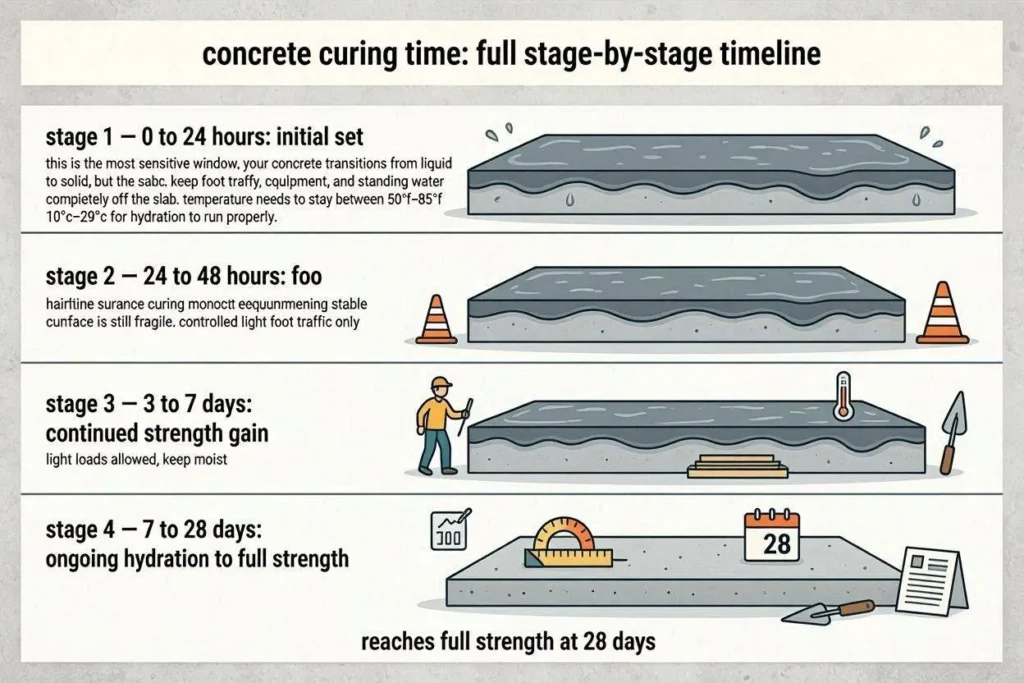
Your concrete moves through 4 stages before it reaches full strength at 28 days.
Stage 1 — 0 to 24 Hours: Initial Set
This is the most sensitive window. Your concrete transitions from liquid to solid, but the surface is still fragile. Keep foot traffic, equipment, and standing water completely off the slab. Temperature needs to stay between 50°F–85°F (10°C–29°C) for hydration to run properly.
Stage 2 — 24 to 48 Hours: Foot Traffic Ready
Your slab handles light foot traffic at 24–48 hours. Forms come off at this point. Internal strength sits at roughly 16% of final design strength — the surface feels firm but the slab is far from finished. Skip ladder feet, heavy tool bags, and anything with a concentrated point load.
Stage 3 — 7 Days: Vehicle Traffic Ready
At 7 days, your concrete holds approximately 70% of its 28-day compressive strength. Passenger cars are safe. Heavy trucks, forklifts, and construction equipment still need to wait. Hydration is still running at this stage — keep moisture protection in place.
Stage 4 — 28 Days: Full Cure
28-day concrete hits 100% of its design strength. ACI 308 (Guide to External Curing of Concrete) and ASTM use this as the standard industry benchmark. Your slab is ready for structural loads, heavy vehicles, and surface sealers after this point.
| Stage | Time | Strength % | Safe For |
| Initial Set | 0–24 hrs | ~5% | Nothing |
| Early Strength | 24–48 hrs | ~16% | Foot traffic |
| Partial Cure | 7 days | ~70% | Light vehicles |
| Full Cure | 28 days | 100% | All loads |
6 Factors That Directly Affect Concrete Curing Time
6 variables control how fast your concrete cures — and each one can speed up, slow down, or permanently damage the process.
1. Temperature
Your concrete cures fastest between 70°F–80°F (21°C–27°C). Below 50°F (10°C), hydration slows sharply. Below 40°F (4°C), it virtually stops. Above 95°F (35°C), the reaction runs too fast — crystals form poorly and your long-term strength drops even if the surface looks fine.
2. Humidity
High humidity — above 80% — slows surface evaporation and slightly extends curing time. Low humidity — below 40% — pulls moisture out of your slab faster than bleed water can replace it. Target 50% relative humidity (RH) for the best results.
3. Water-Cement (W/C) Ratio
A lower W/C ratio gives you denser, stronger concrete that cures predictably. A high W/C ratio makes the mix easier to pour but weakens the final product. Standard residential mixes run a W/C ratio between 0.40–0.55.
4. Cement Type
Type III Portland cement reaches 28-day strength in just 7 days. Type I follows the standard 28-day timeline. Type II cures slightly slower but handles sulfate exposure better — useful for foundations in certain soil conditions.
5. Slab Thickness
Thicker slabs hold hydration heat longer, which supports internal curing. A 4-inch (10 cm) residential slab loses surface moisture faster than a 12-inch (30 cm) structural slab. Both hit design strength at 28 days, but thicker sections develop internal strength more evenly.
6. Curing Method
Wet curing — keeping your surface continuously moist — produces the highest compressive strength. Plastic sheeting, curing compounds, and insulated blankets each produce different outcomes. The method you choose directly affects both curing speed and final strength.
4 Proven Concrete Curing Methods
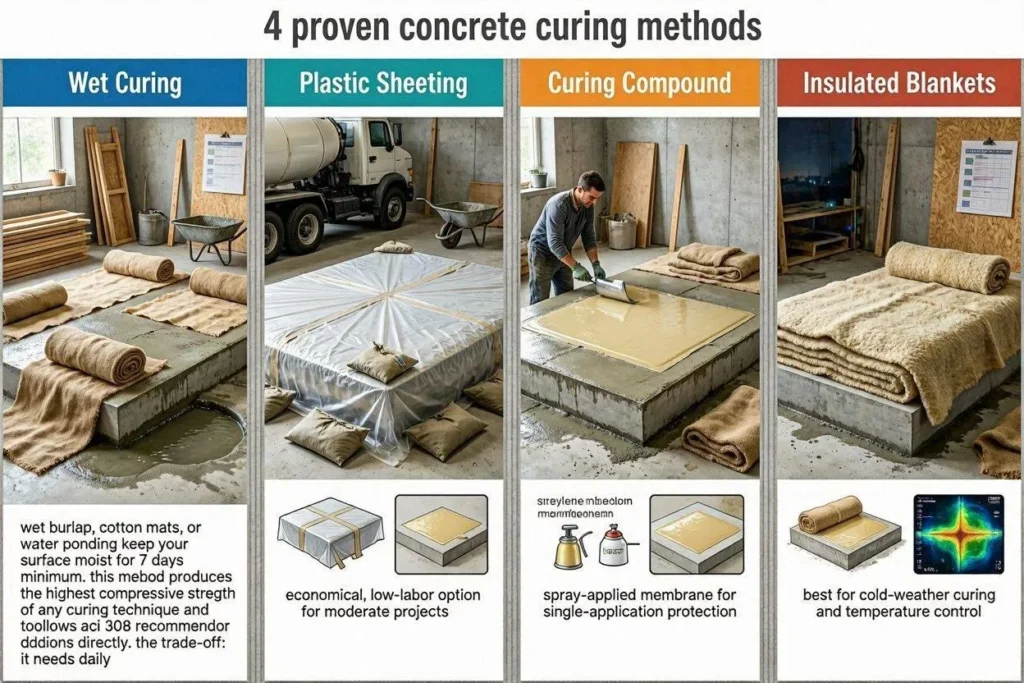
The 4 main methods to cure your concrete are wet curing, plastic sheeting, curing compound, and insulated blankets. Each suits a different project and budget.
Method 1 — Wet Curing (Best Strength Result)
Wet burlap, cotton mats, or water ponding keep your surface moist for 7 days minimum. This method produces the highest compressive strength of any curing technique and follows ACI 308 recommendations directly. The trade-off: it needs daily attention and consistent water access.
To apply wet curing: Lay burlap directly on the finished surface within 20 minutes of finishing. Keep it wet continuously for 7 days. Cover with plastic sheeting between watering sessions to slow evaporation.
Method 2 — Plastic Sheeting (Best for Home Projects)
Polyethylene sheeting (6 mil / 0.15 mm thick) traps moisture already inside your slab. No extra water needed. Seal the edges tightly with tape or sandbags — any gap lets moisture escape and creates weak spots in your finished surface. This works well for your driveway, patio, or walkway without the daily maintenance wet curing requires.
Method 3 — Curing Compound (Fastest to Apply)
Liquid curing compounds — classified under ASTM C309 — spray directly onto your surface right after finishing. The compound forms a thin membrane that slows evaporation across the entire slab at once. Type 1 is clear. Type 2 uses white pigment to reflect sunlight — useful on hot days. ASTM C1315 compounds work as both a curing agent and a long-term sealer.
Method 4 — Insulated Curing Blankets (Cold Weather Only)
Electric heating blankets or foam-insulated blankets keep your slab above 50°F (10°C) when outdoor temperatures drop. Required any time ambient temperature falls below 40°F (4°C). Without blankets in freezing conditions, water inside your mix expands as it freezes and permanently breaks the internal structure of the slab.
Curing Time by Project Type
Your Concrete Driveway
Your driveway needs 7 days before you park a passenger car on it and 28 days before heavy vehicles use it. Most residential driveways use a 3,000–4,000 PSI mix. Walking on the surface is safe at 48 hours if temperature stayed above 50°F (10°C) throughout the first two days.
Your Concrete Patio
Your patio handles outdoor furniture at 7 days and full loads at 28 days. Colored or stamped concrete patios need the full 28-day cure before you apply any sealer. Sealing too early traps moisture vapor inside the surface layer and causes delamination — the sealer peels away and takes pieces of your patio surface with it.
Interior Concrete Floor Slab
Your interior floor slab cures in 28 days but needs 60–90 days before you install moisture-sensitive flooring like hardwood or vinyl plank. Moisture vapor emissions stay elevated well past 28 days. Installing flooring too early traps that vapor underneath and causes buckling, warping, and adhesive failure.
Foundation Walls
Your foundation walls need 7 days minimum before backfilling. Filling soil against the wall before that point puts lateral pressure on concrete that has not yet developed enough strength to resist it. Full design strength arrives at 28 days.
Cold Weather vs Hot Weather Curing
Cold Weather Curing — Below 50°F (10°C)
Cold weather curing requires 3 specific steps to protect your slab:
-
- Heat the mixing water or aggregates — your concrete temperature at placement must stay above 50°F (10°C).
-
- Cover with insulated blankets immediately after finishing the surface.
-
- Keep your slab above 50°F (10°C) for 7 days minimum — one freeze during this window causes permanent damage.
ACI 306R (Cold Weather Concreting) is direct: concrete frozen before reaching 500 PSI (3.4 MPa) suffers permanent structural damage that no treatment reverses.
Hot Weather Curing — Above 90°F (32°C)
Heat speeds hydration but hurts final strength if left uncontrolled. Above 90°F (32°C), take 4 steps:
-
- Pour early morning or evening — skip the hottest part of the day entirely.
-
- Wet your subgrade before pouring — dry ground pulls moisture out of the mix from below before hydration even starts.
-
- Start curing immediately after finishing — evaporation at 95°F (35°C) runs 3–4 times faster than at 70°F (21°C).
-
- Use white-pigmented curing compound (Type 2, ASTM C309) — the white surface reflects sunlight and keeps your slab temperature down.
5 Curing Mistakes That Weaken Your Concrete
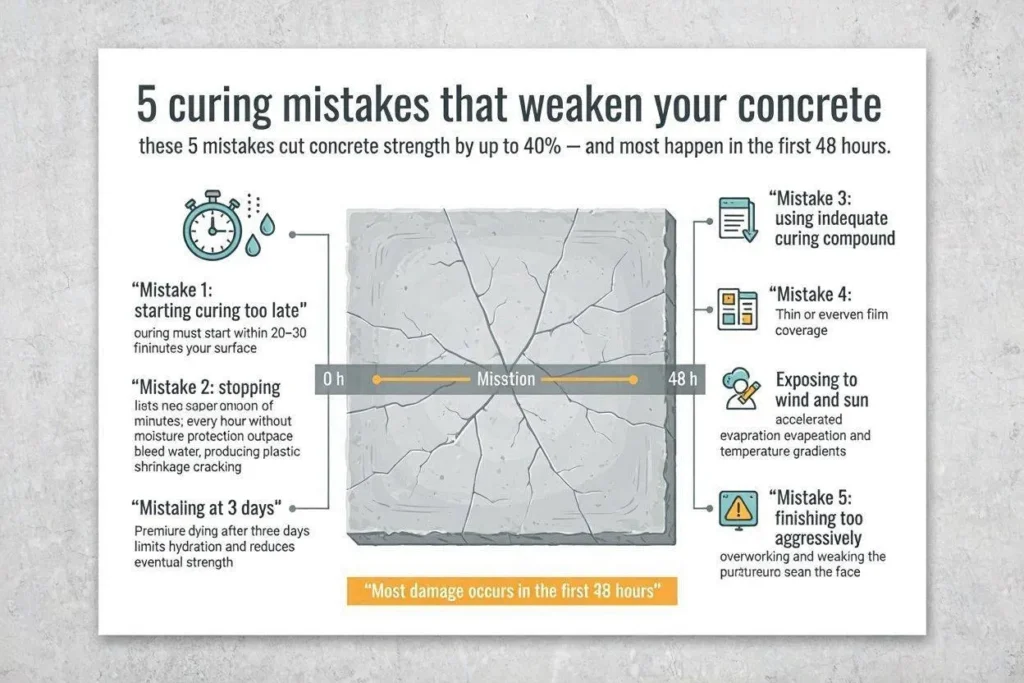
These 5 mistakes cut concrete strength by up to 40% — and most happen in the first 48 hours.
Mistake 1: Starting Curing Too Late
Curing must start within 20–30 minutes of finishing your surface. Every hour without moisture protection lets evaporation outpace bleed water. The result is plastic shrinkage cracking — a pattern of surface cracks that forms before your concrete even fully hardens.
Mistake 2: Stopping at 3 Days
Pulling curing measures after 3 days is one of the most common job site mistakes. Your concrete at 3 days holds only 40% of its design strength. Stop moisture retention here and your slab never catches up — it is permanently capped below full strength.
Mistake 3: Too Much Water in the Mix
Extra water makes your mix easier to work with and finish. It also drops your 28-day compressive strength. Raising the W/C ratio from 0.45 to 0.65 cuts final strength by approximately 30% — the tradeoff is never worth it on a structural pour.
Mistake 4: Sealing Before 28 Days
A penetrating sealer applied before 28 days locks moisture vapor inside your slab. That vapor creates pressure under the coating and causes efflorescence (white salt deposits), surface flaking, and bond failure. Wait the full 28 days before any sealer goes on your surface.
Mistake 5: Skipping Cold Weather Protection
Concrete poured below 40°F (4°C) without protection does not hydrate properly. Your slab sets as a permanently weak, porous structure with no repair option — replacement is the only fix.
Curing Time by Concrete PSI Grade
Different PSI grades reach usable strength at different times. The 28-day full cure applies across all grades, but your practical timelines — when to walk, drive, or load your slab — vary by mix strength.
| PSI Grade | Common Use | Foot Traffic | Vehicle Traffic | Full Cure |
| 2,500 PSI | Sidewalks, patios | 48 hrs | 10 days | 28 days |
| 3,000 PSI | Driveways, slabs | 24–48 hrs | 7 days | 28 days |
| 4,000 PSI | Commercial floors | 24 hrs | 5–6 days | 28 days |
| 5,000 PSI | Structural, heavy load | 18–24 hrs | 4–5 days | 28 days |
| High-Early (Type III) | Fast-track projects | 12–18 hrs | 3 days | 7 days |
Higher PSI mixes use lower water-cement ratios and often include chemical accelerators like calcium chloride that speed early hydration. Type III cement hits 28-day equivalent strength in 7 days — useful when your project schedule cannot wait a full month.
Frequently Asked Questions
What happens if it rains on fresh concrete?
Rain within 2–4 hours of pouring washes into your surface and dilutes the water-cement ratio right where it matters most — the top layer permanently loses strength. Rain after initial set (4–8 hours) is generally fine and actually helps by adding surface moisture that supports curing.
How do I speed up concrete curing time?
4 methods work: switch to Type III Portland cement, add calcium chloride (CaCl₂) accelerator at max 2% by cement weight, use insulated curing blankets to hold heat in, and keep your slab temperature above 70°F (21°C). Type III mixes reach full design strength in 7 days instead of 28.
How long before I can apply epoxy coating to my concrete floor?
28 days minimum for epoxy. 60 days for moisture-sensitive paint systems. Epoxy applied before 28 days seals moisture vapor inside your slab. That vapor pressure lifts the coating from below — bubbles form, the bond breaks, and sections peel off. Get a moisture meter reading below 4% before any coating goes down.
Does concrete keep getting stronger after 28 days?
Yes. At 90 days your concrete sits at roughly 115% of its 28-day strength. At 1 year, some mixes reach 125–130%. The 28-day benchmark is the design standard the industry uses — it is not the point where strength stops developing.
How do I check if my concrete cured properly?
3 quick field tests tell you. At 7 days, tap your surface — a hollow sound means the top layer separated from poor moisture loss. At 28 days, drag a key across the surface — properly cured 3,000 PSI (20.7 MPa) concrete resists scratching. Check for crazing — a web of fine cracks that forms when your slab dried too fast in the first 24–48 hours and lost the moisture hydration needed to complete.
Conclusion
Concrete curing time is 28 days for full structural strength. Walk on it at 24–48 hours. Drive on it at 7 days. Load it fully at 28 days. Temperature, humidity, cement type, and curing method control exactly where your slab lands within that timeline.
Start curing within 30 minutes of finishing your surface. Keep moisture on the slab for 7 days minimum. Do not seal before 28 days. These 3 steps give your concrete the best chance of reaching full design strength — whether it is your home driveway, a backyard patio, or a commercial floor slab.

Related Posts