Micro Concrete: Cost, Application, and Durability Guide (2026)
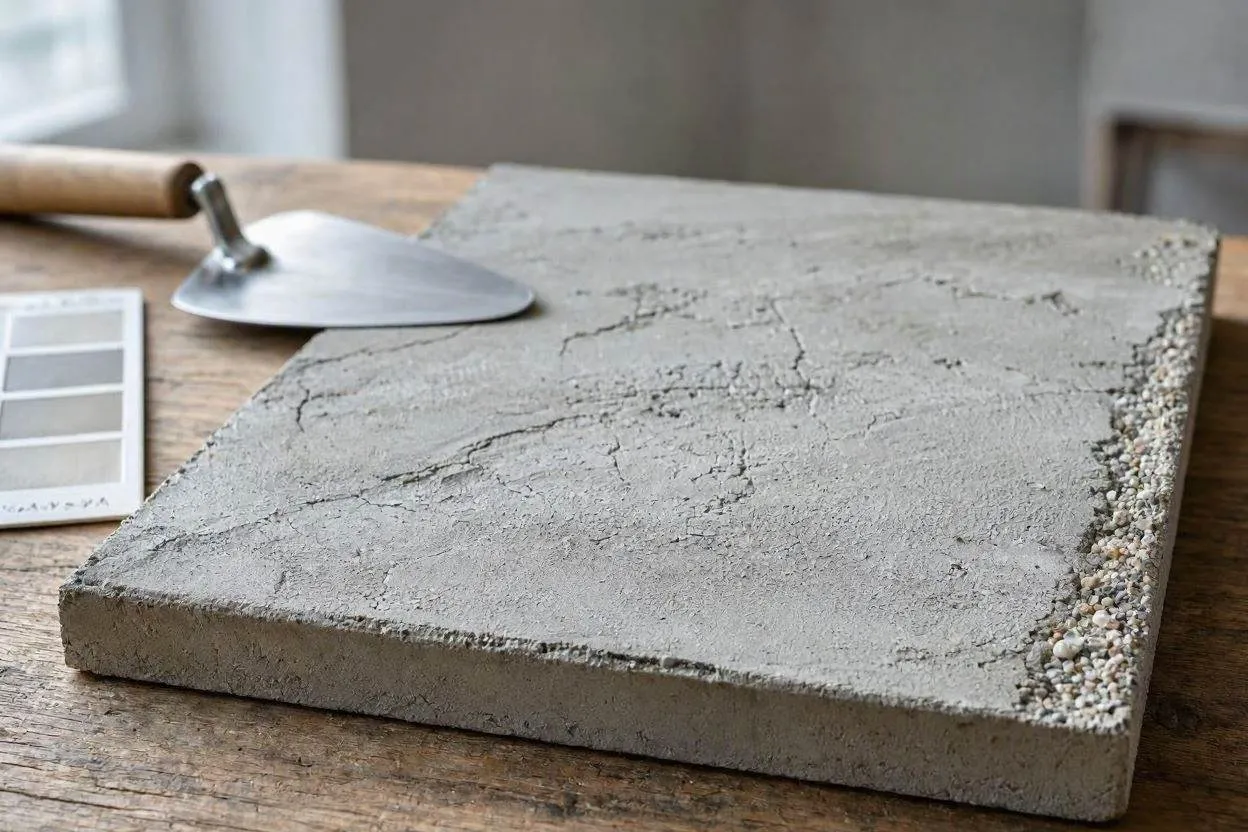
Microconcrete is a cement-based overlay, roughly 2-3 mm (0.08-0.12 inches) thick, applied directly over an existing floor, wall, or countertop to create a continuous, grout-free surface. Installers trowel it on in layers rather than pouring it like standard concrete, and the material bonds to tile, wood, marble, and drywall without demolition. A kitchen renovation that would normally take three weeks of tile removal and subfloor repair often finishes in four to six days with a microconcrete overlay instead.
The term gets used loosely, and that confuses. Microconcrete and microcement come from the same family of cementitious coatings, but they’re not identical. Microcement uses a finer sand and produces a smoother, glass-like finish suited to bathrooms and furniture. Microconcrete carries a coarser aggregate, giving it a slightly more textured surface and better performance in high-traffic or exterior settings like retail floors and patios. If a supplier lists only one name on a product label, ask which aggregate size it uses before assuming the two terms are interchangeable.
How Thick Is a Micro Concrete Layer?
A finished micro concrete installation measures 2 to 3 millimeters (0.08 to 0.12 inches) thick across two or three troweled coats. Contractors apply a base coat first, sand it, and then follow with one or two finish coats before sealing. Each coat alone runs closer to 1 mm, so skipping a layer to save time produces a thinner, less durable surface than the specification calls for.
Compare that to a standard concrete slab, poured at 4 inches (100 mm) or more, and the difference explains why micro concrete works on surfaces that could never support new poured concrete, like a second-storey bathroom floor, for instance, or a kitchen countertop over particleboard cabinetry. The thin profile also means door clearances, cabinet toe-kicks, and transition strips rarely need adjustment during a renovation.
Where Can You Install Micro Concrete?
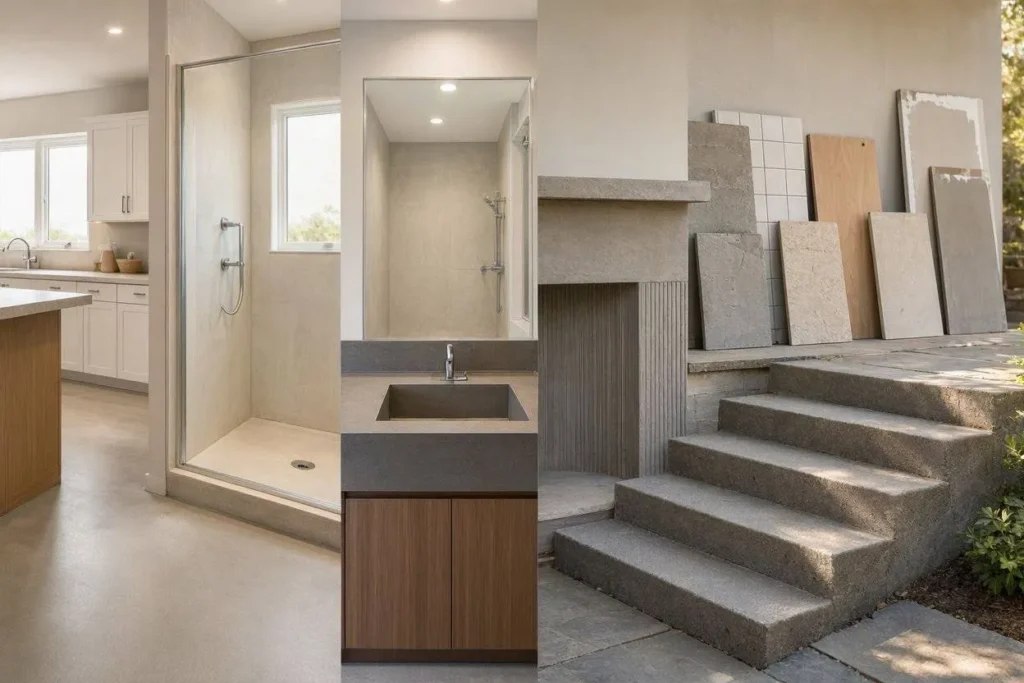
Micro concrete bonds to floors, walls, countertops, shower surrounds, stairs, and furniture, both indoors and outdoors. Manufacturers test it on concrete, ceramic tile, natural stone, plywood, drywall, and cement board, provided each substrate gets primed correctly first.
Common installation surfaces include:
- Kitchen and bathroom floors
- Shower walls and pans
- Countertops and vanity tops
- Fireplace surrounds
- Interior and exterior stairs
- Pool decks and coping
- Reception desks and custom furniture
A 7,300-square-meter (78,000-square-foot) corporate headquarters in the UK used a micro concrete system across its entire ground floor, choosing it specifically because the material could run continuously through lobbies, stairwells, and open-plan offices without a single transition strip. Outdoor applications need a UV-stable topcoat, since standard sealers yellow or chalk within a year or two of direct sun exposure.
How Much Does Micro Concrete Cost?
Micro concrete installation costs $8 to $15 per square foot ($86 to $161 per square meter) for materials and labor in the United States, with premium finishes reaching $20 per square foot. DIY kits alone run $5 to $9 per square foot before tools and sealer.
| Cost Factor | Typical Range (USD) |
| Materials only (per sq ft) | $2.50 – $5.00 |
| Professional labor (per sq ft) | $5.50 – $10.00 |
| Full DIY kit, bundled | $5.00 – $9.00 per sq ft |
| Sealer/topcoat (per sq ft, added) | $0.75 – $2.00 |
Three variables move the price more than any others: substrate condition, square footage, and design complexity. A bathroom floor with existing cracked tile needs grinding or a leveling compound first, which can add $1 to $3 per square foot before the micro concrete ever goes down. Multi-color or stenciled designs push labor time up, since each color needs its own drying window between coats. Buyers comparing micro concrete against tile should also weigh lifecycle cost: tile grout typically needs resealing every 1 to 2 years, while a properly sealed micro concrete surface goes 5 to 7 years between maintenance coats, which narrows the gap between the higher upfront price and tile’s lower sticker cost.
A 150-square-foot bathroom illustrates how these numbers add up in practice. Materials alone land around $600 to $750, a licensed installer adds another $825 to $1,500 in labor, and a wet-area sealer rated for shower use tacks on $110 to $300. The full project typically finishes between $1,500 and $2,500, before factoring in any tile removal or leveling work on the existing floor. Square footage above 300 usually brings the per-square-foot rate down slightly, since setup and mixing time get spread across a larger area, while anything under 50 square feet often costs more per square foot because minimum labor charges apply regardless of size.
Micro Concrete vs. Polished Concrete: What’s the Difference?
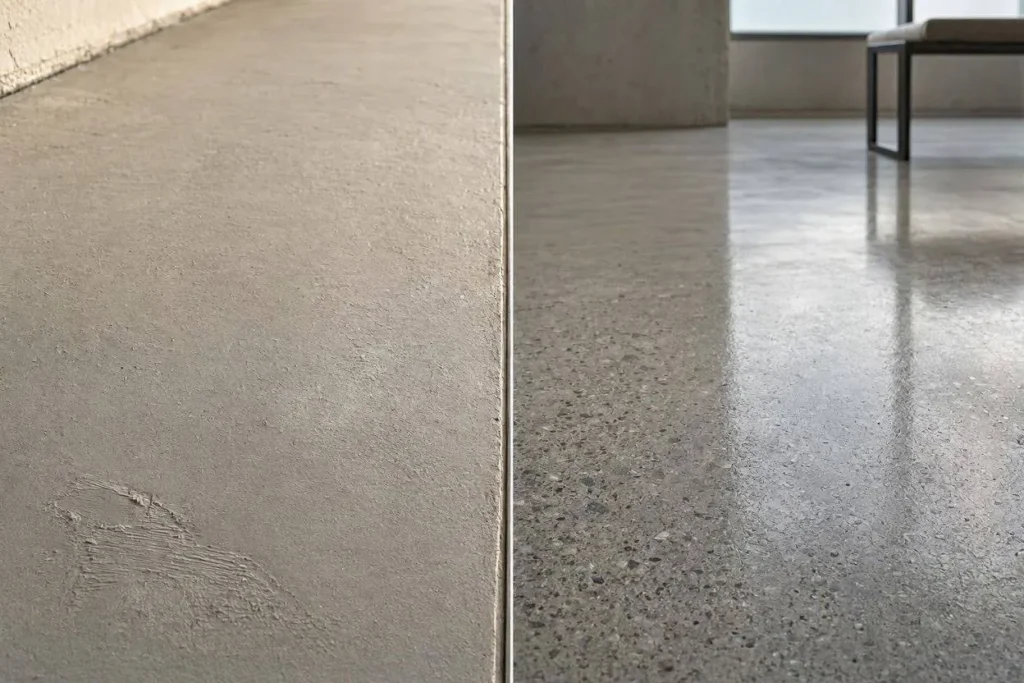
Micro concrete is a thin overlay applied on top of an existing surface, while polished concrete is the structural slab itself, ground and buffed to a shine. That single distinction drives every other difference between the two.
| Feature | Micro Concrete | Polished Concrete |
| Thickness | 2-3 mm (0.08-0.12 in) | Full slab, 4+ in (100+ mm) |
| Substrate compatibility | Tile, wood, drywall, existing concrete | Concrete slab only |
| Renovation demolition | None required | Slab must already exist |
| Color/design flexibility | High pigments, stencils, multiple finishes | Moderate dye penetration varies by slab |
| Typical cost per sq ft | $8 – $20 | $3 – $12 |
| Best for | Renovations, upper floors, walls, countertops | New construction, ground-floor slabs |
A homeowner renovating a second-floor condo bathroom can’t pour and polish new concrete; there’s no slab to work with. Micro concrete solves that problem, since it goes over the existing floor rather than replacing it. New warehouse or garage construction, on the other hand, often favors polished concrete because the slab already exists and grinding it costs less than adding an overlay.
How Is Micro Concrete Applied?
Micro concrete application follows five stages: surface preparation, priming, base coat, finish coat, and sealing, completed over 3 to 7 days depending on drying conditions. Skipping the drying window between coats is the single most common cause of installation failure.
- Prepare the substrate. Clean the surface of dust, grease, and old sealer. Profile concrete floors to an International Concrete Repair Institute (ICRI) surface profile of CSP-1 to CSP-3 using a grinder or shot blaster, if the existing floor was hard-troweled or sealed.
- Apply primer. Match the primer to the substrate: an absorbent primer for raw concrete or a bonding primer for tile or non-porous surfaces.
- Lay the base coat. Embed a fiberglass mesh into the first coat on floors to control cracking, then sand once cured.
- Apply the finish coat(s). Add pigment to the second or third coat for color, using a stainless-steel trowel for a smooth result or a coarser tool for texture.
- Seal the surface. Apply two coats of a water-based or polyurethane sealer, spaced 12 to 24 hours apart.
Air and substrate temperature need to stay between 50°F and 90°F (10°C to 32°C) throughout the process. A floor installed at 45°F in an unheated garage will take noticeably longer to reach initial set sometimes double the standard 6 to 8 hours, and the extended open time raises the risk of dust or debris settling into the wet coat.
Is Micro Concrete Waterproof?
Yes, micro concrete becomes waterproof once sealed if the installer uses a polyurethane or epoxy topcoat rated for wet areas. The base material alone is porous and will absorb water and stain without that sealing layer.
Shower installations need the highest standard of sealing among all micro concrete applications. Installers typically apply two coats of matte polyurethane resin in a criss-cross pattern, using a brush rather than a roller on heavily textured surfaces to avoid missed spots. A full cure inside a shower takes about 7 days before the surface can handle standing water, compared to 24 to 48 hours for a dry-area wall. Volatile Organic Compound (VOC) content varies by sealer brand; some water-based topcoats test at 0 grams per liter, which matters for anyone installing in a bedroom or nursery where off-gassing is a concern.
Does Micro Concrete Crack?
No, micro concrete rarely cracks on its own, but hairline cracks appear if the substrate underneath moves or if the installer skips the fiberglass mesh reinforcement layer. The coating itself is flexible enough to handle minor seasonal expansion; what it can’t handle is a structural crack telegraphing up from below.
Construction joints in the original concrete slab present the biggest risk. A micro concrete layer should never bridge directly across one of these joints, since the joint’s natural movement—sometimes several millimeters over a season will eventually show through the thin coating as a visible line. Contractors handle this by cutting a matching control joint into the finished micro concrete or by installing a flexible caulk transition at that point instead. Freeze-thaw regions of the US, including the Upper Midwest and Northeast, add another variable: exterior micro concrete needs a substrate that’s fully cured and a sealer rated for freeze-thaw cycling, or repeated ice expansion under the surface will eventually cause the coating to delaminate.
Repair works differently than most flooring materials. Instead of replacing a single damaged tile, a technician cleans the cracked area, feathers in a fresh layer of micro concrete, and reseals just that section a process that usually takes half a day and blends into the surrounding floor within a shade or two once fully cured. Homeowners in regions without freeze-thaw cycling, including most of the Southeast and Southwest, see fewer structural cracks overall and more often deal with surface-level wear instead, like fine scratching from dragged furniture legs or grit tracked in from outside.
Can Micro Concrete Go Over Existing Tile?
Yes, micro concrete can go directly over existing ceramic, porcelain, or natural stone tile if the grout lines are filled first and the tile is structurally sound. No demolition, no dumpster, no subfloor exposure.
The prep work matters more here than on a bare concrete substrate. Loose or cracked tiles need to be reset or replaced before coating, since any movement underneath will transfer straight through the 2-3 mm layer above it. A bonding primer designed for non-porous surfaces, glazed tile counts as non-porous and goes down first, followed by the same base-coat-and-finish-coat sequence used on concrete. One caution applies to grout lines wider than 1/4 inch (6 mm): those need to be filled with a cementitious patch product before priming, or the depression will read through the finish coat as a faint shadow line.
How Long Does Micro Concrete Last?
A properly installed and maintained micro concrete surface lasts 10 to 20 years before it needs replacement. Foot traffic volume, cleaning habits, and resealing frequency all shift where a given floor falls in that range.
Residential floors with light-to-moderate traffic and a sealer reapplied every 5 to 7 years tend toward the higher end of that window. Commercial spaces restaurants, retail floors, office lobbies see faster wear from grit tracked in on shoes and from rolling loads like carts or chairs, which pulls the realistic lifespan toward 10 to 12 years without more frequent resealing. Compressive strength testing under American Society for Testing and Materials (ASTM) C-109 shows typical micro concrete products reaching over 4,000 pounds per square inch (PSI) at 28 days, a strength figure well above what a residential floor will ever encounter under normal use.
Is Micro Concrete Slip-Resistant?
Yes, micro concrete meets slip-resistance standards if the installer selects a textured finish or adds a slip-resistant additive to the final sealer coat. A smooth, glass-like micro concrete finish tests below the accessibility threshold and isn’t appropriate for wet areas on its own.
The Americans with Disabilities Act (ADA) sets a minimum coefficient of friction of 0.6 for level walkways and 0.8 for ramps, a standard the Occupational Safety and Health Administration (OSHA) also references for workplace flooring. Installers hit those numbers by broadcasting a fine aggregate additive into the sealer or by choosing a coarser micro concrete grain size for the finish coat itself. Pool decks and exterior stairs almost always specify the textured option; a formal dining room floor more often goes with the smooth finish, since slip risk there is lower and the aesthetic priority shifts toward a polished look.
Should You DIY Micro Concrete or Hire an Installer?
Homeowners can DIY a micro concrete project on small, low-traffic areas like an accent wall or a single vanity top, but floors, showers, and any space over 200 square feet benefit from a licensed installer. The material forgives minor trowel-mark variation; it does not forgive rushed drying times or skipped primer steps, and both mistakes are common on a first attempt.
Look for an installer certified through the International Concrete Repair Institute (ICRI) or one who can show photos of at least three completed floor projects, not just walls floor installation demands a different skill set because of foot-traffic durability requirements. Ask specifically about warranty terms, since coverage on micro concrete work varies widely: some installers warranty the coating for 1 year, others extend coverage to 5 years on both material and labor. A shower or pool deck almost always justifies the professional route, given how much a failed waterproofing job costs to fix compared to the original installation price.
First-time DIY installers run into three mistakes more than any others. Mixing too much water into the powder to make spreading easier weakens the cured strength, sometimes dropping compressive strength by 15 percent or more below the manufacturer’s tested figure. Rushing the sand-and-recoat step between layers leaves visible trowel ridges that no amount of sealer will hide afterward. Working in a room below 50°F (10°C) without a space heater extends cure time well past the standard 6 to 8 hours, and applying a second coat too early on an undercured base causes delamination within months rather than years. A small furniture piece or a single accent wall gives a first-timer room to make these mistakes without the cost of redoing an entire floor.
How Do You Clean and Maintain Micro Concrete?
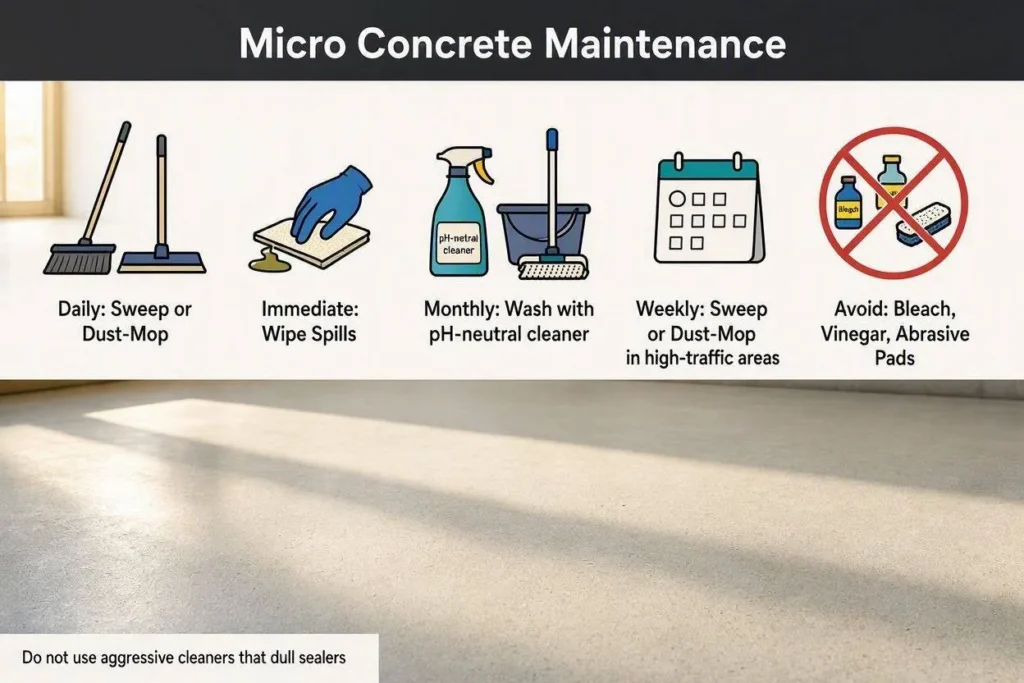
Micro concrete needs a weekly sweep or dust mop and a monthly wash with a pH-neutral cleaner to keep its finish intact. Anything more aggressive bleach, vinegar, or an abrasive scrub pad will dull the sealer over time and shorten the interval before resealing becomes necessary.
Maintenance steps in order:
- Sweep or dust-mop debris daily in high-traffic areas
- Wipe spills immediately, especially oil, wine, or acidic liquids
- Wash weekly with a soft mop and pH-neutral cleaner
- Avoid steel wool, bleach, and ammonia-based products
- Reapply a maintenance wax or topcoat every 12 to 24 months in commercial spaces, or every 3 to 5 years in low-traffic residential rooms
A restaurant kitchen floor with daily grease exposure needs that maintenance topcoat closer to the 12-month mark, while a guest bathroom used a few times a week can go the full 3 to 5 years before resealing shows any real benefit.
Conclusion
Micro concrete solves a specific problem: it delivers a concrete look on surfaces that can’t structurally support poured concrete at a fraction of the thickness and demolition cost. A 2-3 mm overlay bonds to tile, wood, and drywall, holds up 10 to 20 years with routine resealing, and meets ADA slip-resistance standards when the finish coat includes the right additive. The material rewards correct substrate prep and proper cure times, and it punishes shortcuts on both. For floors, showers, and any surface over 200 square feet, a licensed installer with documented floor project experience remains the safer investment over a first-time DIY attempt.
FAQs

Related Posts