How to Install Rubber Roofing: A Complete Step-by-Step Guide
Installing rubber roofing means covering a flat or low-slope deck with an EPDM (ethylene propylene diene monomer) membrane, bonding it down, and sealing every seam and edge against water. Most crews finish an average residential roof in one to three days, and a well-installed system holds up for 25 to 30 years on routine inspection and minor repair alone. What follows is the same sequence licensed roofers work through on real job sites, from deck prep to the final walk.
What Is Rubber Roofing, and Why Do Flat Roofs Use It?
EPDM is a synthetic rubber membrane built to shrug off UV light, ozone, and temperature swings from -40°F to 300°F (-40°C to 149°C). Flat and low-slope roofs use it because it stretches: ASTM D4637, the specification governing EPDM roofing sheet, sets a minimum ultimate elongation of 300%, and manufacturer data sheets from Carlisle, Johns Manville, and WeatherBond report typical values in the 400% to 540% range. That elasticity absorbs the building movement that cracks rigid roofing materials. It also comes in rolls wide enough to cover a 2,000-square-foot garage addition without a single field seam.
You’ll pick from three thicknesses (45, 60, and 90 mil) and two colors. Black absorbs heat and suits colder climates; white reflects sunlight and earns its keep where the cooling bill is the real concern.
Which Installation Method Should You Choose?
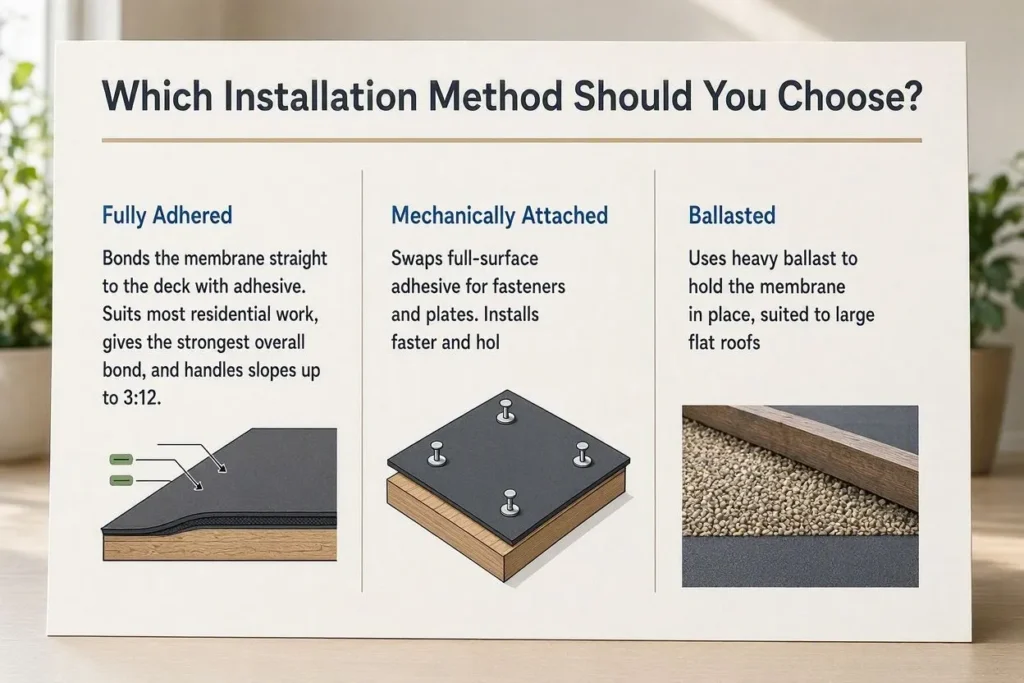
Method determines what you buy, so settle this before ordering anything. There are three, and roof slope, deck material, and local wind exposure decide which one fits.
Fully Adhered
Bonds the membrane straight to the deck with adhesive. Suits most residential work, gives the strongest overall bond, and handles slopes up to 3:12.
Mechanically Attached
Swaps full-surface adhesive for fasteners and plates. Installs faster and holds up well where wind uplift is the concern.
Ballasted
Lays the membrane loose under river stone or pavers. Shows up mostly on large commercial roofs, where skipping the adhesive cost outweighs the added dead load.In a hurricane-prone coastal county, check wind uplift ratings with the building department before choosing mechanically attached over fully adhered. Fastener spacing requirements change by wind zone.The nine steps below cover a fully adhered installation, the most common residential choice. Where a mechanically attached system diverges, I’ve noted it.
What Tools and Materials Do You Need to Install Rubber Roofing?
Roughly a dozen hand tools and five core materials. Skip any one of them, particularly the primer or the seam roller, and you raise the odds of adhesive failure early.
Tools
- Push broom, for sweeping debris off the deck
- Tape measure and chalk line, for laying out membrane placement
- Utility knife or roofing scissors, for cutting membrane to size
- 9-inch paint roller and tray, for water-based bonding adhesive
- 4-inch mini roller, for contact adhesive along edges
- Steel seam roller, 2-inch, for pressing down seam tape
- Notched squeegee, for spreading adhesive evenly
- Hammer or impact driver, for termination bars and plates
- Heat gun, for detail work around pipe boots and corners
- Caulk gun, for lap sealant at seam ends
Materials (Fully Adhered System)
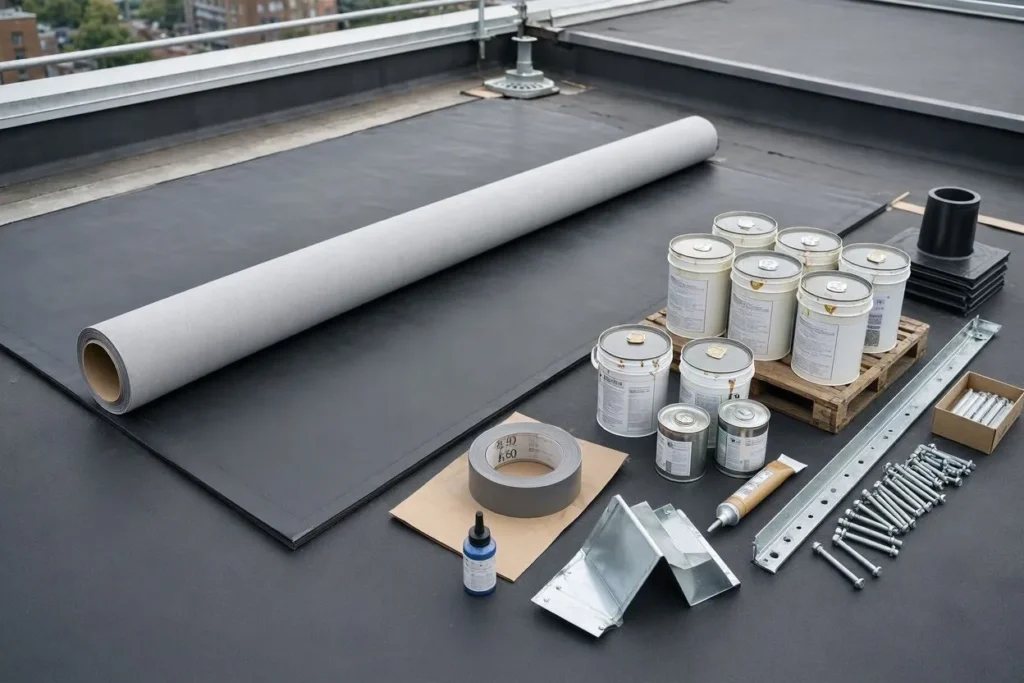
- EPDM membrane (45, 60, or 90 mil, sized to the roof plus 3 to 6 inches of overhang per edge)
- Bonding adhesive: water-based for the field, contact adhesive for edges and details
- Seam tape or splice tape, plus a primer matched to the tape brand
- Termination bar and lag fasteners, spaced every 6 to 12 inches along the perimeter
- Pipe boots, corner flashing, and lap sealant for penetrations and transitions
A mechanically attached system trades most of the field bonding adhesive for fastener-and-plate assemblies at the manufacturer’s specified spacing. Everything else on this list still applies.
How to Install Rubber Roofing in 9 Steps
Every step leans on the one before it. Rushing the dry time between primer and seam tape is the one that comes back to haunt people.
Step 1: Inspect and Prepare the Roof Deck
Sweep the deck clean of dust, nails, and old roofing debris, then check it for soft spots, rot, or protruding fasteners before any membrane comes out of the wrapper. A screw head, staple, or splinter left behind will eventually punch through the rubber from below, once foot traffic or thermal expansion presses the membrane down onto it. If a plywood deck has delaminated sheathing near the chimney base, replace that section now. Patching over rot delays the leak. It doesn’t prevent it.
Going over existing shingles instead of down to bare deck? Read the recovery-board section below before you start, because the prep is different.
Weather matters here too. Lay EPDM only when you’ve got 24 to 48 hours of dry forecast ahead, since a damp deck traps moisture under the membrane and shows up later as blisters.
Step 2: Roll Out and Relax the EPDM Membrane
Unroll the membrane over the deck and walk away for 30 to 60 minutes before you cut or bond anything. Manufacturing and shipping compress the rubber, and a sheet that goes down still contracted will wrinkle as it expands over the next few days. While it relaxes, check which side carries the printed or embossed surface: that marked side faces up, and the smooth side takes the adhesive. Cut the sheet 3 to 6 inches larger than the roof on every side so you’ve got material for the edge details in Step 6.
Step 3: Apply Adhesive to the Substrate and Membrane
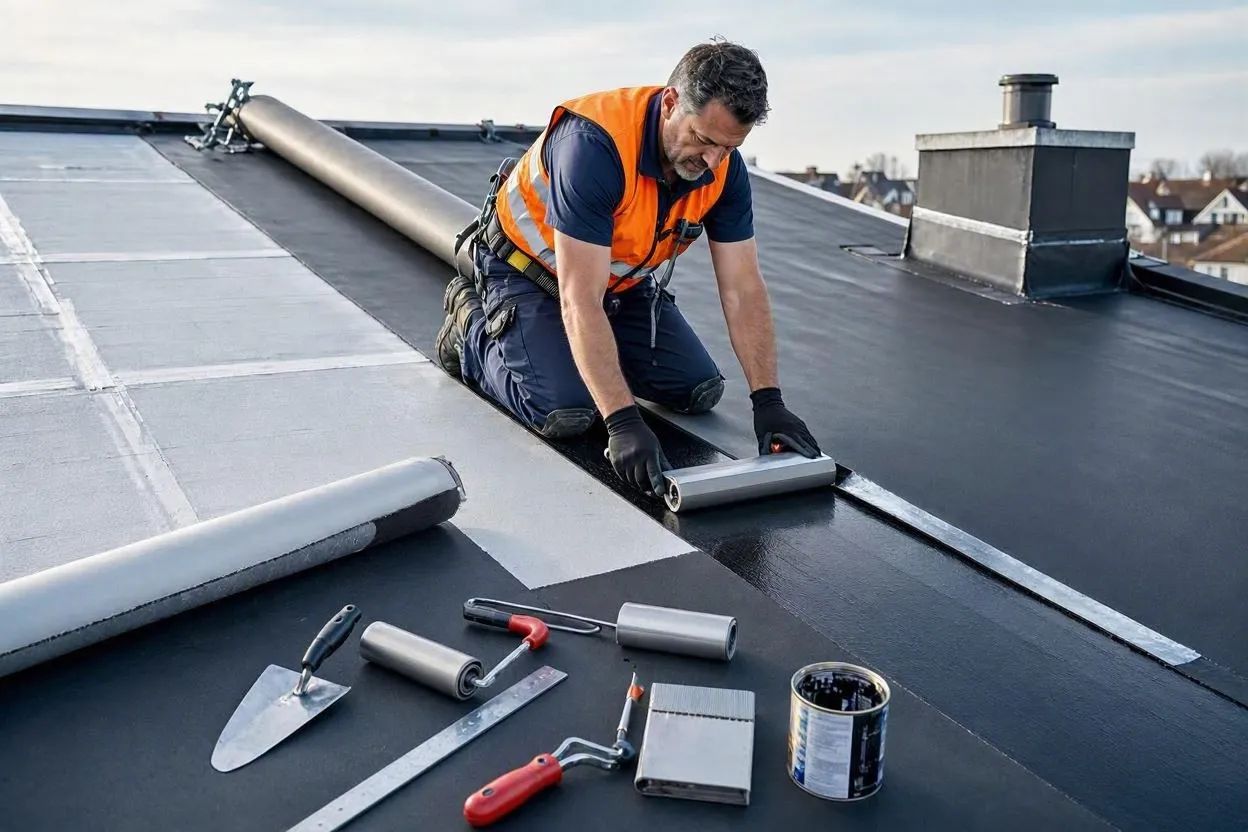
Fold the membrane back to its centerline, then roll bonding adhesive onto both the deck and the underside of the membrane in matching sections. Work in 4- to 5-foot strips so the adhesive doesn’t flash off before you lay the sheet back down. Most bonding adhesives reach the right tack in 5 to 15 minutes, depending on temperature and humidity. Leave a 6-inch (150 mm) strip along every edge free of field adhesive, since that strip gets faster-setting contact adhesive during the perimeter step.
Cold slows the set. A roofer on a 24-by-30-foot garage roof at 55°F is looking at closer to 12 to 15 minutes of open tack time per section, which is exactly why smaller working sections keep the edges from drying out on you.
Step 4: Lay and Press the Membrane
Lower the membrane onto the tacky adhesive starting at the center fold, then broom it outward toward the edges to push the air out ahead of it. Press firmly and work in one direction. Brooming back and forth traps air instead of releasing it. Once the first half is bonded, repeat the fold-back, adhesive, and lay-down routine on the other side.
Bubbles that survive the brooming can usually be weighted out. Drop a sandbag on the spot for a few hours and the membrane settles back into full contact.
Step 5: Seal the Seams
Wash both sides of every seam with seam primer, then apply seam tape and roll it hard with a steel seam roller. EPDM rolls are dusted with a release agent that keeps the rubber from sticking to itself in storage, and tape applied over that powder simply won’t bond to the membrane underneath. The wash is what removes it. Overlap seams by at least 3 inches and finish each seam end with a dab of lap sealant so water can’t wick into the edge.
Seam tape wants firm, even pressure across its full width. Short overlapping passes with the roller generally bond better than one long continuous run.
Step 6: Secure the Perimeter with Termination Bar
Trim the excess membrane back to a 1-inch overhang past the roof edge, then fasten the termination bar along the perimeter every 6 to 12 inches. The bar compresses the membrane edge against the deck and keeps wind from getting under the rubber at its weakest point. Cap it with a bead of lap sealant when you’re done, since exposed fastener heads are a classic source of pinhole leaks.
A metal drip edge or PVC trim piece usually covers the bar. It looks finished and adds a second layer of water protection.
Step 7: Flash Penetrations and Edges
Cut and seal EPDM boots or flashing around every pipe, vent, and roof edge before you call the installation done. Each penetration interrupts the membrane’s continuous seal, which is why they’re the first place to check when a flat roof leaks. A satellite mount, an HVAC curb, a skylight frame: each needs its own pre-formed or field-fabricated flashing, sealed with adhesive and topped with lap sealant.
Corners deserve extra attention. Pre-fabricated inside and outside corner patches bond more reliably than hand-cut pieces, because factory-molded corners don’t develop the pinholes that show up when someone folds flat membrane into a 90-degree angle.
Step 8: Check Drainage
Confirm water actually leaves the roof before you finish. Drains and scuppers should sit at the low point with the membrane sloped toward them, and any tapered insulation should carry water off rather than into a corner. This is easier to fix now than after the flashing is sealed.
Step 9: Inspect the Finished Roof
Walk the roof and check every seam, edge, and penetration for full adhesion. Lift each seam edge slightly with a probe tool; a properly bonded seam won’t separate under light pressure. Photograph the roof from several angles, since manufacturers generally want proof of proper installation before honoring a materials warranty.
If you can, water-test it. Run a hose over each seam and penetration for about 10 minutes while someone checks the ceiling below for moisture.
Can You Install Rubber Roofing Over Existing Shingles?
Yes, as long as the shingles are structurally sound and a recovery board separates the membrane from the old surface. Uneven or curling shingles telegraph through EPDM over time, so have a licensed inspector confirm there’s no rot, no more than one existing layer, and no soft spots before recovery starts. Contractors typically lay a ½-inch or ⅝-inch recovery board over the shingles first, which gives a smooth, uniform base and adds a little insulation value.
When the shingle layer already sags or shows moisture damage, tear it off. Covering a compromised deck just buys time on a more expensive repair.
What Does It Cost to Install Rubber Roofing?
Pricing below reflects 2026 contractor estimates and should be re-checked annually.
Published 2026 ranges cluster between $4 and $13 per square foot installed. Angi puts national EPDM installation at $7.43 to $13.00 per square foot; HomeGuide’s range runs $4 to $10; several regional contractors report $6 to $12. On a 1,500-square-foot flat roof, that spread works out to roughly $6,000 to $19,500 depending on membrane thickness, region, and whether there’s a tear-off involved. Materials alone run about $2 to $5 per square foot, with labor accounting for the rest.
Because labor is the larger share, DIY cuts the total substantially. Budget anyway for adhesive, seam tape, and tool rental if you don’t already own roofing equipment. Permits typically add several hundred dollars.
Should You Install Rubber Roofing Yourself or Hire a Contractor?
If you’ve got roofing or general construction experience and the roof is under 500 square feet with a simple, obstruction-free layout, you can handle it yourself. A shed roof or a small porch overhang is a fair weekend project for anyone comfortable with adhesives and hand tools. A full residential roof with multiple penetrations, parapet walls, or awkward access is a different scale of job, and the mistakes on it are expensive.
Warranty terms should factor in too. Many EPDM manufacturers restrict their labor or system warranties to work performed by certified installers, and materials warranties often carry installation conditions of their own. Read the specific warranty document for the membrane you’re buying before you commit to doing it yourself, especially if there’s any chance of an insurance claim later.
What Building Codes Apply to Rubber Roof Installation?
Rubber roof installation in the U.S. falls under the International Building Code or the International Residential Code, which set minimums for wind uplift resistance, fire classification, and drainage slope. The 2024 editions are the most recent published, but jurisdictions adopt on their own schedules and amend regionally, so a coastal wind zone may require denser fastening than the same roof inland. Confirm which edition your jurisdiction enforces. Most municipalities also require a permit before reroofing and a final inspection.
Drainage codes generally call for a minimum slope of ¼ inch per foot to prevent ponding, which is what drives the insulation tapering back in deck prep.
What Mistakes Ruin a Rubber Roof Installation?
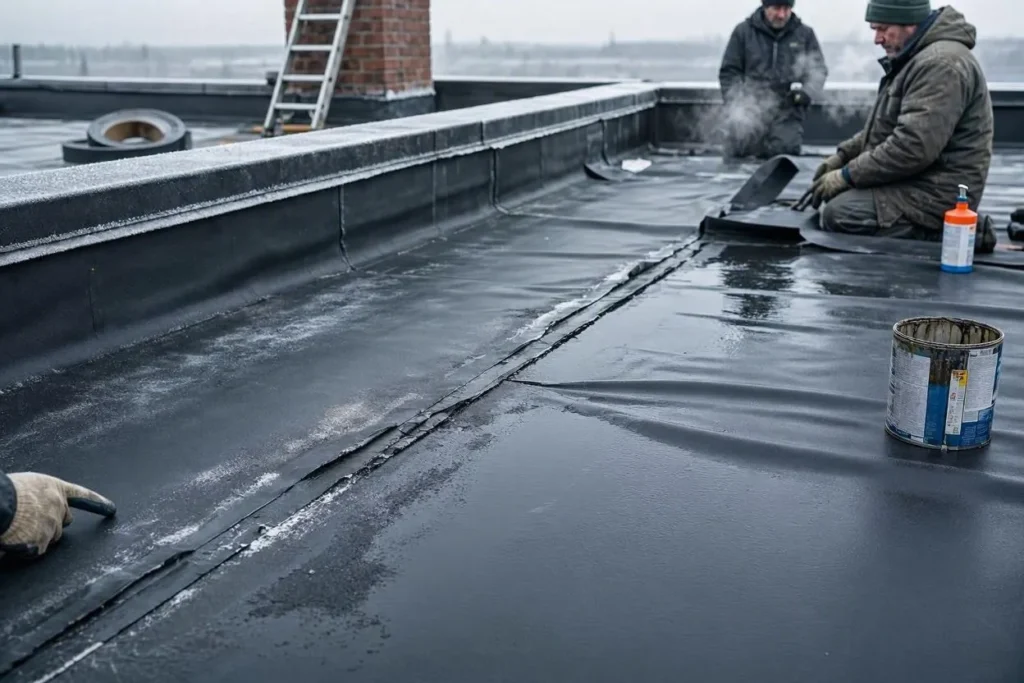
Poor seam prep is the one to worry about most. Skip the primer wash before the seam tape and the tape never bonds to the membrane properly. Rushing the relaxation period is close behind: cut and bond the rubber before it’s fully relaxed and you get wrinkles that pond water and stress the seams. Adhesive choice matters too, since cold-weather jobs need low-temperature-rated adhesive; standard adhesive won’t cure properly below 40°F (4°C).
Leaving fastener heads exposed without a lap-sealant cap creates slow, hard-to-trace leaks that surface months later. And overlooking positive drainage during layout is the quiet killer: a section that holds water more than 48 hours after rainfall ages the membrane faster and voids most manufacturer warranties.
How Do You Maintain a Rubber Roof After Installation?
Inspect twice a year, spring and fall, checking seams, flashing, and drainage. Clear leaves and debris off the surface and out of the drains each season, since trapped organic material holds moisture against the membrane. In a neighborhood with heavy autumn leaf drop, that means going up every four to six weeks from October through December just to keep the drains open.
Reapply lap sealant to seam ends and penetration flashing every 5 to 7 years whether or not anything looks wrong. Sealant degrades under UV faster than the membrane does.
Conclusion
A clean deck, a fully relaxed membrane, properly primed seams, and a sealed perimeter aren’t optional at any roof size. Anyone taking on a small shed or porch roof can follow this same process with hand tools and a weekend of dry weather. Bigger or code-sensitive projects belong to a licensed contractor who can document the work for warranty purposes. The membrane is rated for 25 to 30 years either way. The seams, flashing, and drainage decide whether it gets there.
Frequently Asked Questions

Related Posts