Concrete Slump Test: Step-by-Step ASTM C143 Guide
A cone, a rod, and three minutes. That’s all it takes to know whether a truckload of concrete matches what the engineer specified. Crews on job sites, from small residential pours to state DOT bridge decks, run this test dozens of times a week. Plenty of contractors still treat it as a formality instead of what it actually is: the last checkpoint before concrete becomes permanent. This guide walks through the ASTM C143 procedure the way inspectors expect it done, the equipment that actually meets spec, and what a slump reading tells you about the pour ahead.
What Is a Concrete Slump Test?
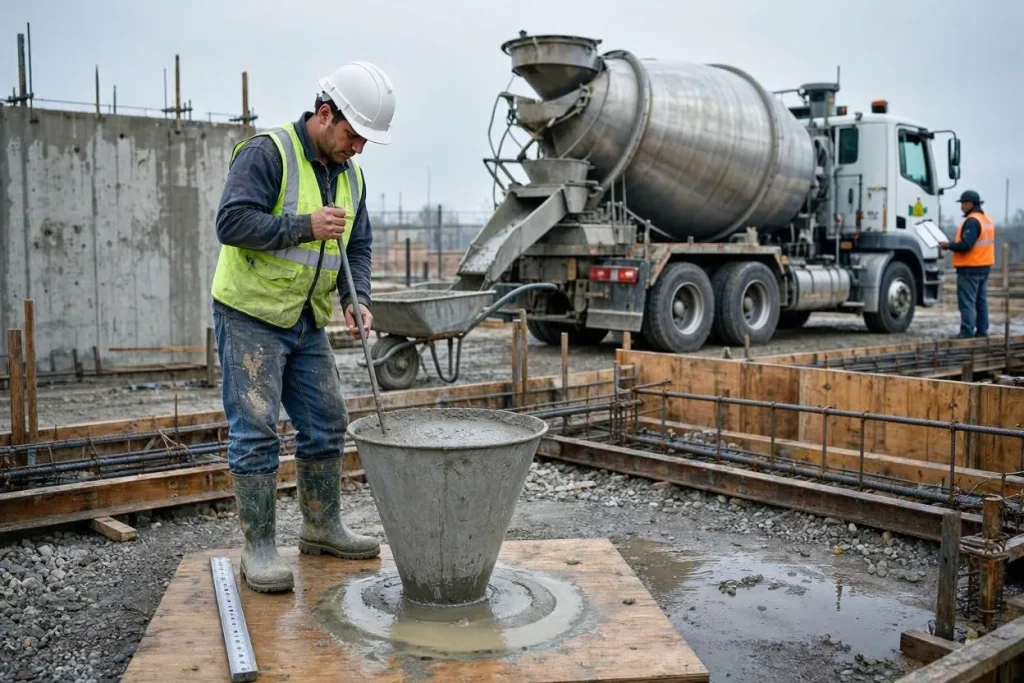
A concrete slump test measures the workability and consistency of freshly mixed concrete by tracking how far a molded sample settles once a metal cone is lifted away. Duff Abrams developed the method back in 1918, and ASTM later standardized it as ASTM C143, still the go-to test for contractors, inspectors, and ready-mix suppliers today. A technician packs fresh concrete into a truncated cone, removes the cone, then measures the vertical drop in inches or millimeters. That one number tells a crew whether a batch is too stiff, too wet, or right where the mix design says it should be.
Slump doesn’t measure strength directly. It measures water content relative to the cementitious materials in a batch, and while that correlates loosely with strength, the two aren’t interchangeable. A low-slump mix for slip-form paving behaves nothing like a high-slump mix poured into a congested rebar cage, and the slump test exists precisely to catch that mismatch before the pour goes wrong.
Why Does the Concrete Slump Test Matter?
Because it’s the fastest way to confirm a delivered batch actually matches the approved mix design before placement starts. Ready-mix trucks arrive with concrete batched off-site, sometimes an hour or more before it reaches the forms, and small variations in water content, admixture dosing, or mixing time can shift the consistency enough to matter. Skip the test, and a crew has no independent check on what’s inside the drum.
Take a bridge deck pour specified for a 3-inch slump. If the delivered load tests at 6 inches, the inspector can reject it on the spot, before 10 cubic yards of out-of-spec concrete gets placed and cured into a structural element nobody can easily fix later. The test itself takes under three minutes. Rejecting a bad load after it’s already poured costs days.
Slump results also feed into troubleshooting down the line. Cracking, weak compressive strength readings, or poor finishing quality often trace back to slump records showing a mix that ran too wet on the days those problems showed up. Inspectors and engineers use that paper trail to isolate causes instead of guessing after the fact.
What Equipment Do You Need?
A standard slump test kit has five parts: a slump cone, a base plate, a tamping rod, a sample scoop, and a measuring device. Each has specific dimensional requirements under ASTM C143, and improvising, say, using a piece of rebar instead of a proper tamping rod, introduces measurement error you won’t catch until the numbers stop making sense.
Slump cone
A truncated cone, 8 inches (203 mm) diameter at the base, 4 inches (102 mm) at the top, 12 inches (305 mm) tall, made of seamless metal or ABS plastic.
Base plate
A rigid, non-absorbent, flat plate with clamps that hold the cone’s foot tabs during filling and rodding.
Tamping rod
A steel rod, 5/8 inch (16 mm) diameter, 24 inches (610 mm) long, with a hemispherical tip for even consolidation.
Sample scoop
A round-bottom scoop sized to fill the cone without repeated small additions that disturb the sample.
Measuring device
A tape measure or rigid ruler with 1/4-inch (5 mm) graduations or finer.
Plastic cones now outsell steel cones on a lot of job sites. They resist dents and rust, weigh less to carry between pours, and hold their shape through hundreds of tests. A dented or corroded steel cone changes the internal volume slightly, and a technician has no way of catching that without a fresh reference cone on hand.
How Do You Perform a Concrete Slump Test?
Six steps: sampling, filling, rodding, striking off, lifting, and measuring, all inside a strict 2.5-minute window once filling begins. ASTM C143 and AASHTO T119 govern the procedure, and both specify exact timing, layer depths, and rodding counts. Skip a detail and the result doesn’t count.
Collect a representative sample. Pull concrete from the middle portion of the batch during discharge, following ASTM C172, combining two or more portions collected within a 15-minute window into one composite sample. A sample taken only from the start or end of a truck’s discharge won’t represent the load, since water and aggregate settle differently throughout a mixer drum.
Fill the cone in three layers. Pack the dampened cone in three layers of equal volume, not equal depth, working out to roughly 2 5/8 inches (67 mm) for the first layer and 6 1/8 inches (156 mm) for the second, measured cumulatively from the base. Move the scoop around the opening while pouring so the sample distributes evenly instead of piling in one spot.
Rod each layer 25 times. Consolidate each layer with 25 strokes of the tamping rod, spiraling from the outer edge toward the center, letting the rod penetrate about 1 inch (25 mm) into the layer below on the second and third passes. Don’t strike the base plate hard on the bottom layer. If the cone shifts or gets bumped during rodding, toss the sample and start fresh. There’s no partial-credit version of this test.
Strike off the excess. Roll the tamping rod across the top of the cone in a screeding motion to remove excess concrete flush with the rim, without pressing down or compacting the sample. A clean strike-off matters because leftover material piled above the rim adds false height to the “before” measurement.
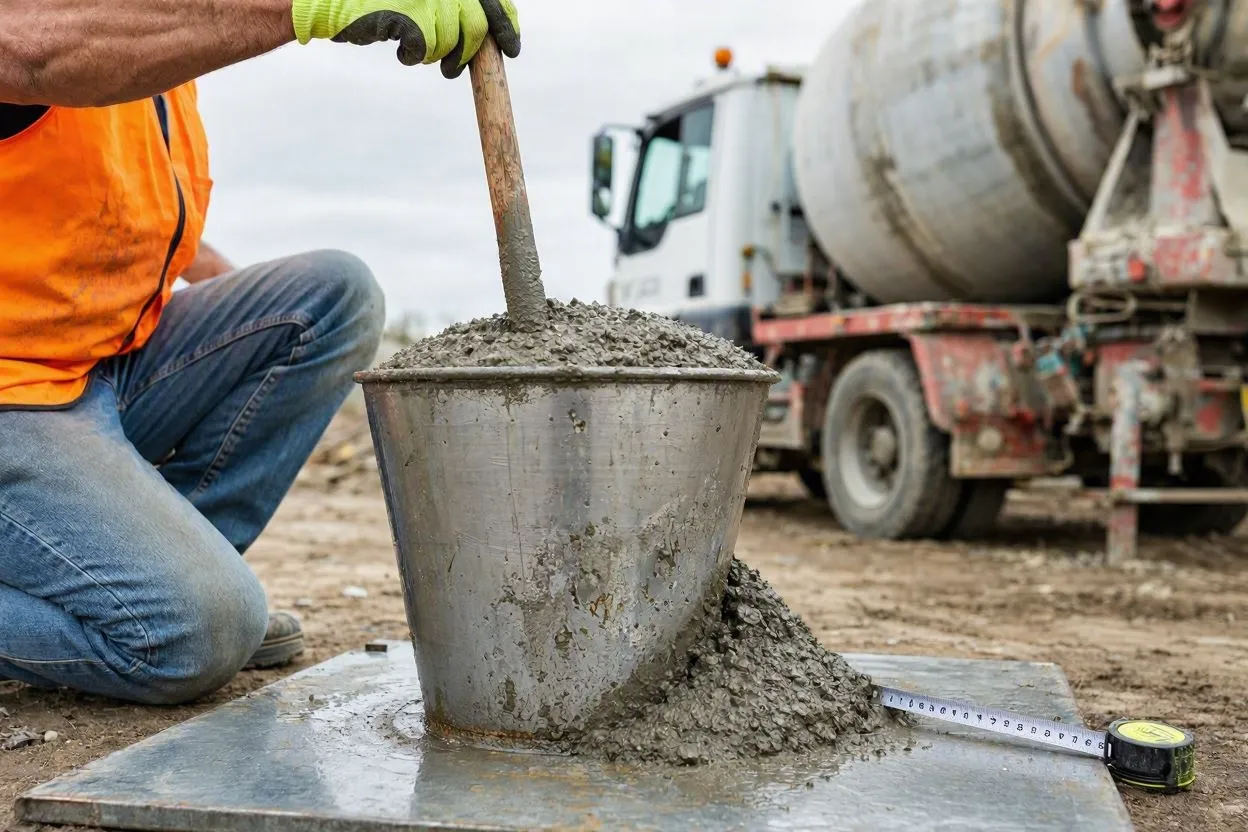
Lift the cone straight up. Raise it vertically in one smooth motion over 5 seconds, plus or minus 2 seconds, no twisting, no jarring. Two hands on the handles keep the lift straight; a single-handed lift almost always tilts and skews the result.
Measure the slump. Place the inverted cone next to the slumped concrete, lay the tamping rod across the top, and measure the vertical distance down to the displaced center of the concrete’s top surface, to the nearest 1/4 inch (5 mm). If part of the sample shears off to one side, discard it and retest. A sheared sample doesn’t produce a meaningful reading.
What Do the Results Mean?
Slump results fall into four general workability ranges, and which range is “right” depends entirely on where the concrete is going. A 2-inch slump perfect for a slip-form paving machine would be unworkable in a heavily reinforced column. A 6-inch slump that flows easily around rebar would be far too wet for a highway pavement.
| Slump Range | Inches (mm) | Workability | Typical Use |
| Very Low | 0–1 in (0–25 mm) | Very stiff | Slip-form paving, vibrated pavement |
| Low | 1–2 in (25–50 mm) | Low | Lightly reinforced foundations, hand-vibrated pavement |
| Medium | 2–4 in (50–100 mm) | Moderate | Standard reinforced slabs and walls, manual placement |
| High | 4–7 in (100–175 mm) | High | Congested reinforcement, complex formwork, pump lines |
A residential driveway crew going for decorative flatwork usually targets 4 to 5 inches (100–127 mm), a consistency roughly like thick oatmeal: workable enough to finish cleanly without being so wet it weakens the surface. Most specs allow plus or minus 1 inch (25 mm) from target, and loads that miss by more than 1.5 inches (38 mm) typically get rejected outright.
What Are the Types of Slump?
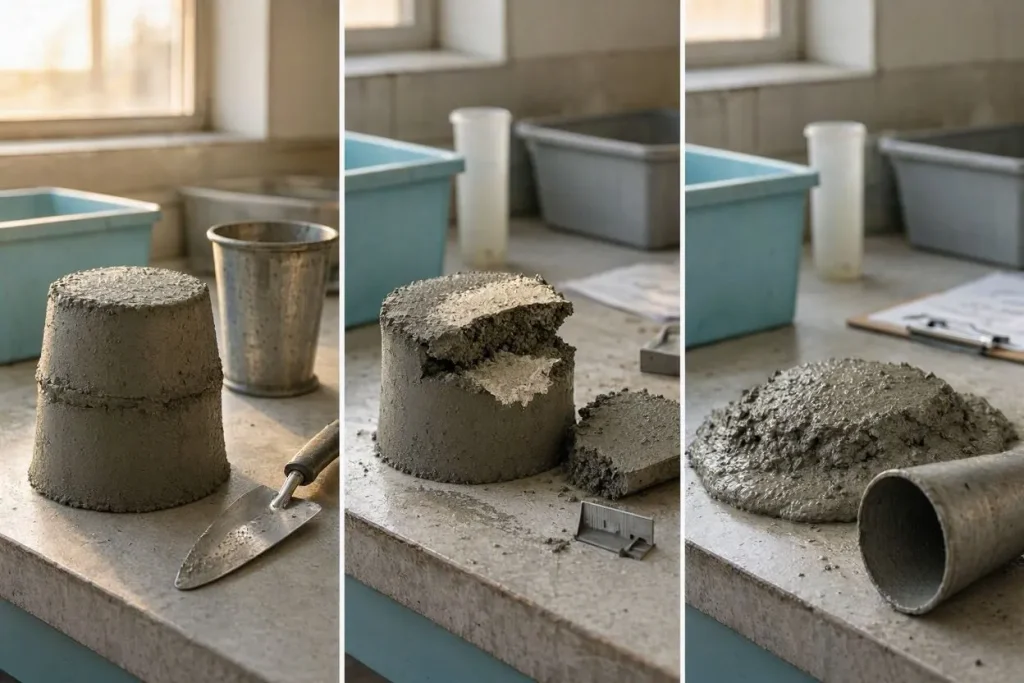
Once the cone comes off, slump falls into three visual categories, and each points to something different.
True slump happens when the sample settles evenly, staying mostly intact with the sides bulging slightly. That’s a well-proportioned mix that’ll behave predictably during placement.
Shear slump is when the top portion breaks away and slides to one side, usually from low paste content or too much sand. Because the sample separated, the measurement means nothing. Discard it and retest.
Collapse slump is when the sample falls apart almost completely once the cone lifts. That usually points to too much water or not enough fine aggregate, and the batch generally needs adjustment before it goes anywhere near the forms.
A field tech who spots shear or collapse slump on-site can flag the load for rejection or correction before a single yard gets placed. It turns a simple visual read into an early warning system for the whole pour.
How Does Slump Affect Strength?
Higher slump generally means lower compressive strength, with each additional inch cutting roughly 500 psi (3.4 MPa) under typical field conditions. Adding water to raise slump raises the water-to-cementitious-materials ratio, and that higher ratio means more porosity once the concrete cures.
That porosity does more than weaken the concrete. It raises vulnerability to freeze-thaw cycling and deicing salt damage in colder climates, and it can dull the color in integrally pigmented decorative work. A crew that waters down a stiff load to make placement easier is trading long-term durability for short-term convenience, and that trade rarely shows up as a problem until years later, when cracking or surface scaling appears.
ASTM C143 itself notes that the slump-strength relationship holds up clearly in controlled lab conditions but gets less reliable in the field, where aggregate variability, admixture interactions, and temperature swings complicate things. Treat slump as an early warning, not a substitute for compressive strength testing on cured cylinders.
What Is a Slump Flow Test?
A slump flow test measures the horizontal spread of self-consolidating concrete (SCC) instead of the vertical drop, since a standard slump test on SCC produces readings too high to be useful. ASTM C1611 governs the slump flow test, while ASTM C1621 measures passing ability: how well SCC flows around tightly spaced rebar without blocking.
SCC uses high-range water reducers, commonly called superplasticizers, to get flowability without the excess water that would otherwise wreck strength and durability. Run a standard 12-inch cone test on SCC and you might get a reading near the full cone height with no useful data, which is exactly why the industry built a separate spread-measurement method for these mixes. Precast manufacturers pouring architectural panels with dense reinforcement lean on slump flow data far more than standard slump numbers.
How Much Does a Slump Test Cost?
Between $50 and $300, depending on the testing lab, region, and whether it’s bundled with other fresh-concrete testing. Independent testing companies often price it lower when combined with air content, unit weight, and compressive-strength cylinder molding on the same visit, since the technician’s already mobilized and equipped.
Compression testing on cured cylinders runs a good deal higher, often $300 to $800 per set, because it needs curing time, lab equipment, and a return visit weeks later. Slump testing stays cheap because it’s fast, needs no lab processing, and gives an immediate go or no-go answer on-site. For a general contractor running a multi-pour commercial project, a few hundred dollars for routine slump checks is nothing next to the cost of a rejected foundation pour discovered too late.
How Often Should You Test?
Most specs call for a test on the first load of the day, then again every 50 cubic yards or with any change in mix design, weather, or supplier truck. A high-rise foundation pour spanning 400 cubic yards in a single day would typically see eight or more individual checks under that interval, not one test for the whole thing.
Testing frequency also climbs on projects with strict quality documentation requirements, like bridge decks, dams, or airport runways under state DOT standards. Smaller residential jobs pouring 20 or 30 cubic yards in one visit sometimes get by with a single test at the start of discharge, though skipping it entirely removes the only independent check a homeowner or contractor has on what the truck actually delivered.
Can Sensors Replace Manual Testing?

Not yet, though sensor-based monitoring is gaining ground on larger commercial projects as a real-time supplement to the manual test. These systems mount on ready-mix trucks and measure hydraulic pressure, drum rotation energy, or drum tilt to estimate slump continuously during transit, rather than at one moment on arrival.
They can flag a batch drifting out of spec while it’s still en route, giving a plant time to adjust before the truck even reaches the site. But they don’t yet satisfy the acceptance-testing requirements written into most specs, which still call for a physical ASTM C143 measurement at the point of placement. That gap will probably narrow as more state DOTs pilot sensor-based acceptance protocols, but for now, the cone and tamping rod are still what inspectors sign off on.
Conclusion
The slump test remains the fastest, cheapest way to catch a bad batch before it becomes a permanent part of a structure. A technician with a cone, a tamping rod, and three minutes can confirm whether the concrete arriving at the job site matches what the engineer approved, or whether it needs to go back on the truck. Skip that check, and you’re trading a $50 to $300 test for the risk of a rejected pour, a compromised structural element, or years of premature cracking that traces back to one load nobody bothered to measure.
FAQs

Related Posts