How to Drill Into Concrete: Step-by-Step Guide for Walls & Floors
Drilling into concrete is a core construction and masonry skill, and it depends entirely on using the right power tool for the job: a hammer drill or rotary hammer, matched to the correct carbide-tipped masonry bit and drill chuck. Most first-time attempts end the same way: a smoking bit, a hole that wanders an inch off the mark, or a screw that spins loose the moment weight touches it. None of that comes down to bad luck. It comes down to skipping a step, usually the pilot hole or the dust cleanout, that takes ten extra seconds and saves the whole project. This guide covers the power tools, the bit sizes, the anchor hardware, and the exact drilling sequence that turns a stubborn slab into a clean, secure hole on the first try.
What You Need Before You Drill Into Concrete
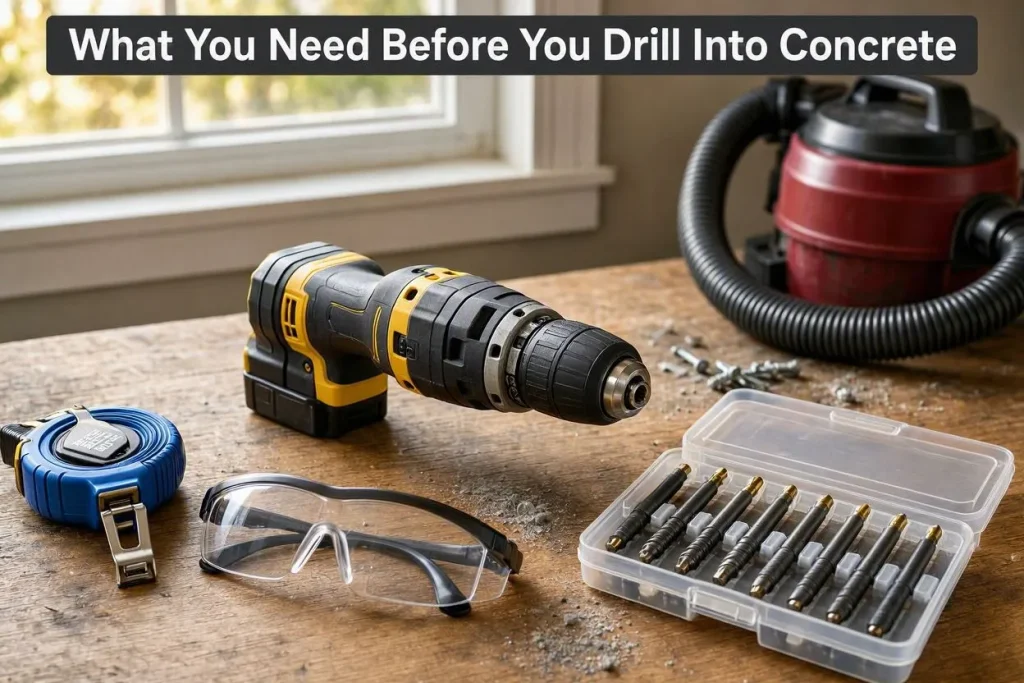
A hammer drill, a carbide-tipped masonry bit, a tape measure, safety glasses, and a shop vacuum cover the basics for drilling into concrete. Most home projects, like mounting a TV bracket or anchoring a shelf, need nothing more than this list of power tools and hardware. A hammer drill typically runs $60 to $150 for a homeowner-grade model, and a five-piece carbide masonry bit set usually costs under $20 at most hardware and home improvement stores.
Gather this power tool and hardware kit before starting:
- Hammer drill (corded or 20V cordless), or a rotary hammer for larger jobs
- Carbide-tipped masonry bits in the sizes your project requires
- Tape measure and a carpenter’s pencil or chalk
- Masking tape (prevents the bit from wandering on smooth concrete)
- Safety glasses, work gloves, and ear protection
- N95 dust mask or respirator
- Shop vacuum or handheld vacuum
- Concrete anchors or screws matched to your fastener size
A rebar scanner or stud finder rated for concrete adds roughly $30 to $60 to the list, but it’s worth the cost on load-bearing walls or older slabs where hidden steel is common. Skip it on a simple interior partition wall, and you’re unlikely to run into trouble.
Cordless and corded hammer drills perform about the same on small anchor holes; battery-powered models have closed the power gap over the past several years. Corded models still win on deep or repeated drilling since heat buildup, not battery life, becomes the limiting factor after the first dozen holes.
What Type of Power Tool Works Best for Concrete?
A hammer drill handles most home projects, while a rotary hammer (SDS drill) is the better choice for holes larger than 1/2 inch (12.7 mm) or deeper than 3 inches (76 mm). Both are staple power tools on any construction site, but they use different drive mechanisms, and picking the wrong one turns a 10-minute job into an hour of frustration. Check your hole size and depth against the list below before you buy or rent equipment.
- Hammer drill: A dual-mode power drill that uses a clutch mechanism to add a light hammering action to regular rotation. Runs on a standard keyed or keyless chuck. Best for anchor holes up to 1/2 inch (12.7 mm) in standard residential concrete.
- Rotary hammer (SDS drill): A dedicated masonry power tool that uses a piston-driven hammer mechanism, delivering far more impact force through an SDS-plus or SDS-max chuck. Best for thick slabs, reinforced concrete, or repeated drilling across dozens of holes on a job site.
- Diamond core drill: A specialty power tool that cuts a clean circular hole using a diamond-segmented core bit instead of hammering. Best for large-diameter holes, such as running a 4-inch (102 mm) vent pipe through a foundation wall.
- Standard drill with masonry bit: A general-purpose power drill fitted with a carbide masonry bit. Works only on soft, newer concrete for shallow holes under 1 inch (25 mm) deep and takes noticeably longer than a hammer-equipped tool.
Cordless platforms in the 18V to 20V range now cover most residential hammer-drill and rotary-hammer work, while corded models and larger SDS-max rotary hammers remain standard equipment for contractors doing high-volume concrete drilling.
Recommended Power Tool Specs by Job Type
| Tool Type | Chuck / Bit System | Typical Voltage / Power | Impact Rate (BPM) | Best For |
| Standard drill | 3-jaw keyless chuck | 12V–20V cordless or 5–7 amp corded | None (rotation only) | Shallow holes in soft, newer concrete |
| Hammer drill | 3-jaw keyless chuck | 18V–20V cordless or 6–8 amp corded | ~20,000–48,000 BPM | Anchor holes up to 1/2 in. in standard residential concrete |
| Rotary hammer (SDS-plus) | SDS-plus bit system | 18V–20V cordless or 6–8 amp corded | ~4,000–5,500 BPM (higher impact energy per blow) | Reinforced concrete, thick slabs, repeated drilling |
| Rotary hammer (SDS-max) | SDS-max bit system | Corded, or 36V/60V cordless | Lower BPM, much higher impact energy per blow | Heavy demolition-grade drilling, large-diameter holes, commercial jobs |
| Diamond core drill | Diamond core bit, threaded arbor | Corded, often rig-mounted | N/A (rotary cutting, not impact) | Large-diameter holes, pipe and conduit penetrations |
BPM (blows per minute) measures impact frequency, not impact energy; an SDS-max rotary hammer strikes less often than a standard hammer drill but delivers far more force per blow, which is why it clears reinforced concrete faster despite the lower BPM number.
Older concrete tends to be denser than newer pours, since older mix formulas generally used less water and more aggregate by volume. A hammer drill that breezes through a modern driveway slab may stall on a decades-old foundation wall, so match the tool to the age of the structure, not just the project size.
Rental counters at most hardware stores carry rotary hammers and core drills by the day, often somewhere in the $40 to $90 range for a 24-hour rental. Buying a rotary hammer tends to pay off only if you’ll use it more than a handful of times; for a single project, renting is usually the cheaper route.
Types of Concrete Anchors and When to Use Them
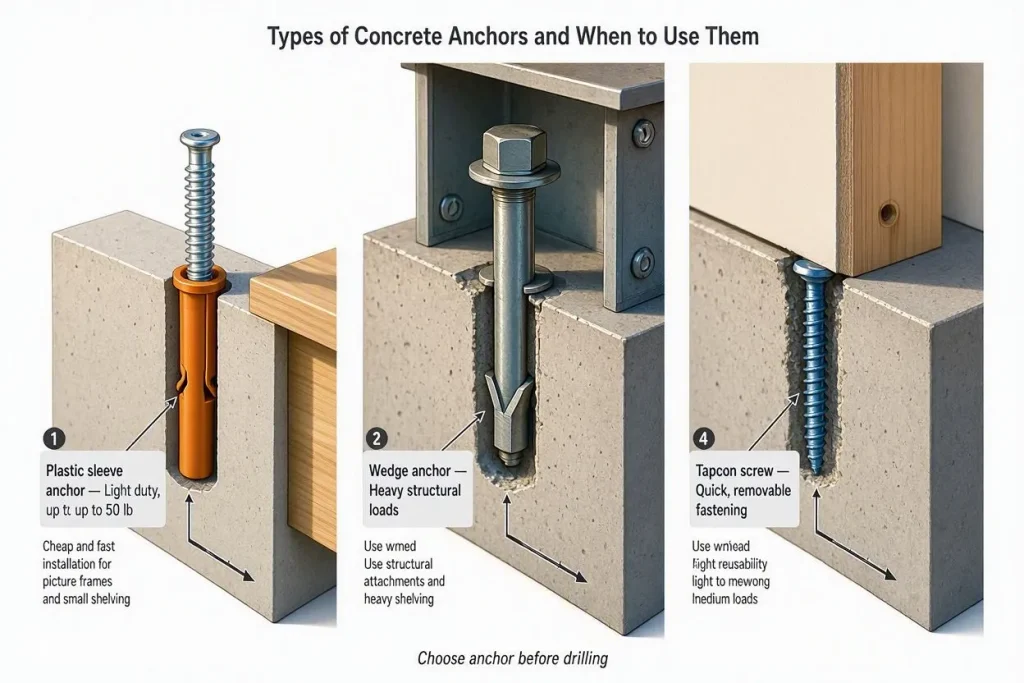
Plastic sleeve anchors work for light loads under 50 pounds, wedge anchors handle heavy structural loads, and Tapcon screws suit quick, removable fastening jobs. Picking the wrong anchor type is a common reason a properly drilled hole still fails to hold weight, so choose yours before you start drilling.
- Plastic sleeve anchors: Cheap, fast to install, and rated for light-duty hanging like picture frames or small shelving. Not suitable for anything load-bearing.
- Wedge anchors: A steel anchor that expands against the sides of the hole as a nut tightens. Rated for structural loads up to several hundred pounds depending on diameter, and standard for securing ledger boards, railings, or heavy equipment mounts.
- Tapcon screws: A self-tapping concrete screw that threads directly into a pre-drilled pilot hole, no separate anchor sleeve required. Fast to install and easy to remove later, which makes these the go-to choice for electrical boxes, conduit clips, and furring strips.
- Epoxy anchors: A two-part adhesive injected into the hole before the bolt is set, then left to cure for 24 hours. Used where vibration or repeated load cycling would loosen a mechanical anchor over time, such as machinery mounts or handrail posts.
Match the anchor to the load, not just the hole size. A 1/4-inch (6.35 mm) sleeve anchor and a 1/4-inch (6.35 mm) wedge anchor use the same drill bit, but the wedge anchor is rated to hold substantially more pull-out weight.
How to Drill Into Concrete: Step-by-Step Instructions
Drilling into concrete takes seven steps: scan the area, mark the spot, select a bit, set up the drill, start a pilot hole, drill to depth, then clean and anchor the hole. Each step matters on its own, and skipping one is usually where DIY drilling projects go wrong.
Step 1: Check for rebar, wiring, and plumbing. Scan the wall or slab with a rebar detector or stud finder built for concrete before drilling. A basic handheld scanner reads through 3 to 4 inches (76 to 102 mm) of concrete and flags steel reinforcement, conduit, or PEX plumbing lines. Older homes built before 1980 often have wiring run directly through concrete slabs, so this step isn’t optional on floor jobs. Skip the scan on load-bearing structures only if a contractor has already mapped the reinforcement for you.
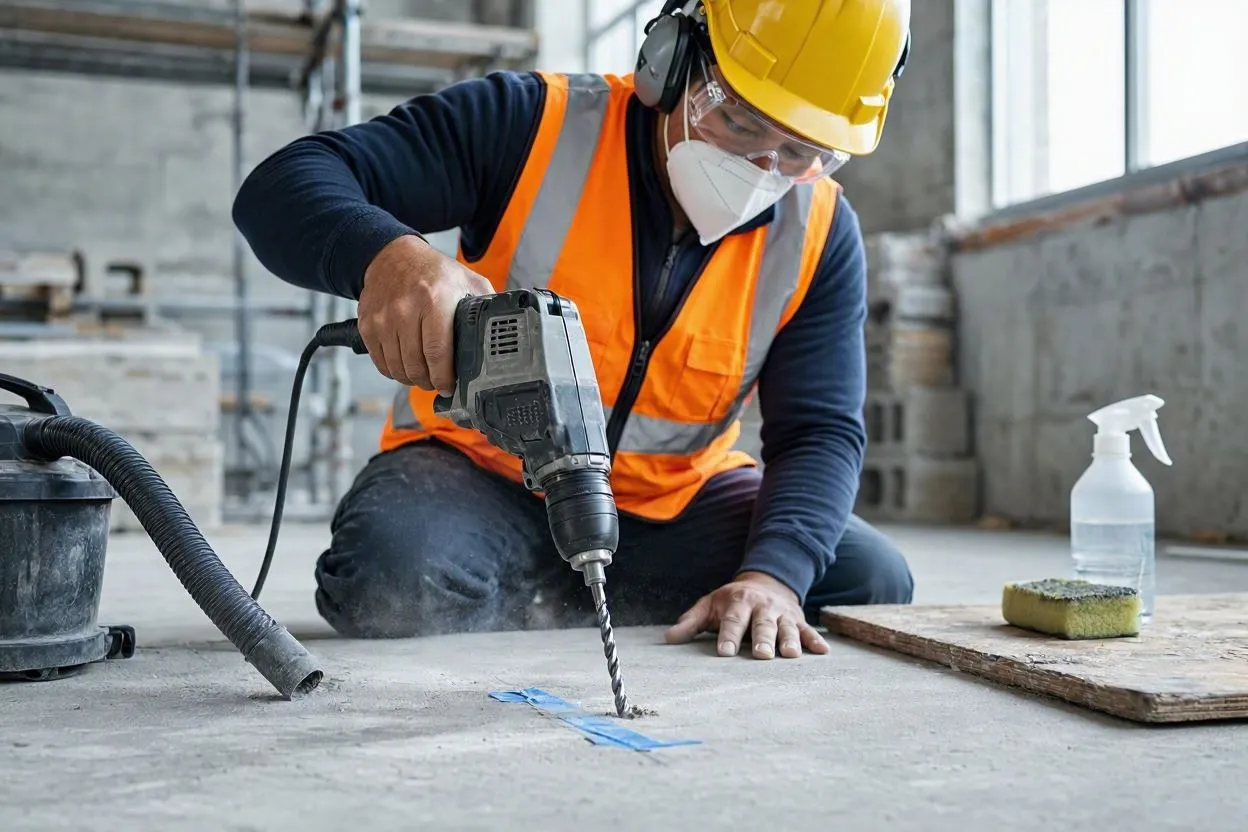
Step 2: Mark and Measure the Drill Point Mark the exact drill location with a carpenter’s pencil, then press a strip of masking tape over the spot. The tape gives the bit tip something to grip on smooth, troweled concrete, which stops it from skating sideways during the first few seconds of contact. Hold the bracket, anchor, or fixture in place first and double-check the hole spacing against it. A single measurement error on a four-hole mounting bracket means starting the entire layout over.
Step 3: Choose the Right Masonry Drill Bit Match the bit diameter to the anchor or screw manufacturer’s spec, printed on the packaging in nearly every case. As a general rule, a 3/16-inch (4.8 mm) concrete screw needs a 5/32-inch (4 mm) bit, and a 1/4-inch (6.35 mm) screw needs a 3/16-inch (4.8 mm) bit. Carbide-tipped bits last considerably longer in concrete than standard masonry bits, so buy two of the size you need most. Masonry work wears bits down fast, and a dull bit produces a ragged, oversized hole instead of a clean one.
Step 4: Set Up the Hammer Drill Fit the masonry bit into the chuck, switch the drill to hammer mode, and set the depth stop rod to the required hole depth. Most hammer drills include a sliding metal rod on the side handle for exactly this purpose. Set it to 1/4 inch (6 mm) deeper than the anchor length, since that extra depth gives concrete dust somewhere to settle instead of blocking the anchor from seating flush. Attach the side handle if your drill has one; a bit that binds mid-hole can twist the tool hard enough to sprain a wrist.
Step 5: Drill the Pilot Hole Start the drill at its lowest speed setting, holding it perpendicular to the surface, and let the tip bite in for the first 5 to 10 seconds. Rushing this stage is the single biggest cause of bit wander on painted or sealed concrete. Once the pilot hole reaches roughly 1/4 inch (6 mm) deep, the bit is seated and ready for full-speed drilling.
Step 6: Drill to Full Depth Increase drill speed once the pilot hole is set, applying steady forward pressure without forcing the tool. Pull the bit out every 1 to 2 inches (25 to 51 mm) of depth to clear dust from the hole; a clogged hole traps heat and can snap a bit in seconds. Deep holes, past 4 inches (102 mm), benefit from a short pause every 30 seconds to let the bit cool. Stop the instant the depth stop rod touches the surface.
Step 7: Clear the Hole and Install the Anchor Blow or vacuum the dust out of the finished hole before inserting an anchor; leftover debris can cut the anchor’s holding strength significantly. A turkey baster or a can of compressed air works fine for small holes. Tap the anchor in flush with a hammer, then drive the screw or bolt until it sits tight. If the screw spins without gripping, drill a fresh hole 1 inch (25 mm) away rather than trying to force a bigger anchor into a stripped one.
How to Drill Into Concrete Without Cracking It
Concrete cracks during drilling almost exclusively from excess pressure or a bit running at too high a speed near the surface, not from the hammer function itself. Properly cured concrete rated at 3,000 to 4,000 PSI resists cracking well under normal hammer-drill impact. Cracking usually traces back to one of three causes:
- Forcing the drill. Pushing hard doesn’t speed up the hole; it just adds shear stress the concrete wasn’t built to absorb.
- Drilling near an edge or corner. Holes within 2 inches (51 mm) of a slab edge are far more likely to chip or blow out the far side.
- Working on damaged or poorly cured concrete. Concrete poured in freezing temperatures or mixed with too little cement is more brittle than a standard slab, and no technique fully compensates for that.
Switch off the hammer function for the last 1/4 inch (6 mm) of a through-hole if chipping on the exit side is a concern; drilling that final stretch at rotation-only speed produces a cleaner break-through with less blowout. This trick matters most on visible surfaces like a fireplace hearth or a finished patio slab, where a ragged exit hole is hard to hide.
A drill running consistently hot to the touch, past what a hand can hold comfortably for more than 2 to 3 seconds, is under too much pressure regardless of what the hole looks like. Back off, clear the dust, and let the bit run at a lighter touch for the next few inches. Bits rarely fail from age; they fail from heat cycling caused by repeated overheating and cooling.
Common Mistakes When Drilling Into Concrete
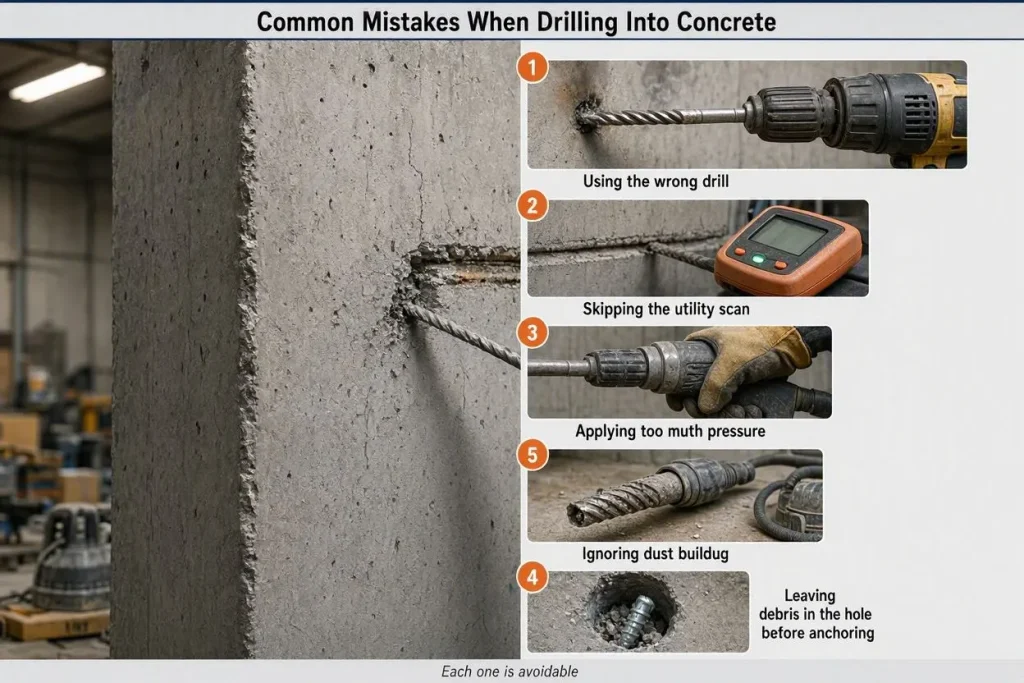
The five most common mistakes are using the wrong drill, skipping the utility scan, applying too much pressure, ignoring dust buildup, and leaving debris in the hole before anchoring. Each one is avoidable, and each one shows up constantly in DIY forum threads from people troubleshooting a failed hole.
- Using a standard drill instead of a hammer drill. A regular drill can eventually punch through concrete, but it burns through bits fast and takes far longer per hole.
- Skipping the rebar or utility scan. Hitting a live electrical line or a water pipe turns a weekend project into an emergency repair bill.
- Applying too much forward pressure. Overheated bits lose their carbide tip and snap off inside the hole, which is difficult and sometimes impossible to remove.
- Letting dust build up inside the hole. Packed dust insulates the bit tip, causing it to overheat even at correct pressure and speed.
- Skipping the final cleanout before anchoring. A dusty hole holds an anchor far below its rated pull-out strength, which is exactly why Step 7 above isn’t optional.
Safety: Silica Dust and Protective Equipment
Wear safety glasses, a dust mask rated N95 or higher, work gloves, and ear protection every time a hammer drill touches concrete. Concrete dust contains crystalline silica, a fine particulate that OSHA classifies as a serious respiratory hazard under its Respirable Crystalline Silica in Construction standard, 29 CFR 1926.1153. Repeated, unprotected exposure over months or years is linked to silicosis, a permanent lung disease with no cure.
For projects involving more than a handful of holes, attach a dust extraction shroud to the drill or run a shop vacuum nozzle near the bit while drilling. Wet-cutting methods, where a light stream of water settles the dust before it becomes airborne, cut silica exposure dramatically compared to dry drilling and are standard practice on commercial job sites.
When to Hire a Professional Instead of DIY
Hire a licensed concrete or masonry contractor for holes larger than 2 inches (51 mm) in diameter, any drilling into load-bearing structural elements, or projects where a utility scan shows rebar directly in the drill path. A residential DIYer with a hammer drill and a masonry bit set can safely handle anchor holes, shelf brackets, and small conduit runs. Larger or structural work calls for different equipment and training.
Professional concrete drilling and coring services typically use diamond core bits mounted on a fixed rig, along with ground penetrating radar (GPR) to map hidden steel and utilities before the first cut. A professional core drilling visit for a straightforward residential job often runs somewhere between $150 and $400, depending on hole count and diameter, though it’s worth getting a local quote since prices vary by region. That cost is usually worth it to avoid a severed water line or a compromised structural wall.
Conclusion
Drilling into concrete comes down to matching the right tool to the job, checking what’s hidden behind the surface first, and letting the bit do the work instead of forcing it. A hammer drill and a basic masonry bit set handle nearly every anchor, shelf, or bracket job around a typical house. Save the diamond core drill and the professional quote for holes over 2 inches (51 mm) or anything touching a load-bearing wall. Get those two decisions right, and the rest of the process, from marking the spot to setting the final anchor, takes less time than most people expect.
FAQs

Related Posts