How to Fix a Cracked Concrete Slab: Step-by-Step Repair Guide
A cracked concrete slab shows up in driveways, garage floors, patios, and basements for one of five common reasons, and most homeowners can knock the repair out in an afternoon. Concrete shrinks as it cures. Soil shifts underneath the slab. Water pressure builds against foundations, and temperature swings expand and contract the material every season. Knowing which cause applies to your slab is what decides whether you reach for a tube of caulk or call a foundation specialist (a contractor certified to diagnose and repair structural damage to a home’s foundation).
This guide walks through the exact steps for fixing a cracked slab, breaks the repair down by crack width and surface type, and covers cost, timing, and the point where a DIY job stops being safe.
What Causes a Cracked Concrete Slab?
Concrete slabs crack from five main causes:
- Shrinkage during curing. Shrinkage cracks show up first, often within the first year after a pour, because excess water in the mix evaporates and the concrete contracts slightly as it hardens.
- Soil settlement. As the ground beneath a slab compacts or erodes over time, sections of concrete lose support and drop unevenly, creating a crack along the weak point. A driveway poured over improperly compacted fill, for example, can develop a stair-step crack within two or three years even though the concrete itself was mixed just fine.
- Hydrostatic pressure. Groundwater builds up against a foundation wall or floor, especially after heavy rain, and pushes upward or inward until the concrete gives way at its weakest point. This mainly affects basement and below-grade slabs.
- Temperature swings. Concrete expands in summer heat and contracts in freezing temperatures, and repeated freeze-thaw cycles widen existing hairline cracks year after year. This is worse in regions with real winters.
- Poor drainage. Water that pools near a foundation instead of draining away speeds up both soil movement and hydrostatic pressure at once, tying the other causes together.
Is Your Cracked Concrete Slab a DIY Fix or a Structural Problem?
Most cracks under 1/8 inch wide are cosmetic and safe to repair yourself. Anything wider, or showing vertical displacement, points to a structural issue. Structural engineers use crack width as their first diagnostic marker, and that 1/8-inch threshold shows up consistently across professional guidance.
A hairline crack that runs in a single straight line and stays the same width along its length usually just means the concrete shrank slightly during curing. It rarely grows and almost never affects the slab’s load-bearing capacity. A crack that widens at one end, steps sideways in a brick-like pattern, or sits higher on one side than the other tells a different story. Vertical displacement, even a difference as small as 1/4 inch between the two sides of a crack, means the ground underneath has shifted and the slab is no longer level.
You can track a suspicious crack with an inexpensive crack monitor, a small plastic gauge that costs under $15 and shows whether a crack is actively widening over several weeks. No movement after 30 days? Filling it yourself is safe. If the monitor shows the crack has grown even 1/16 inch, get an inspection before doing any cosmetic repair. Patching over an active crack only hides a problem that keeps getting worse underneath the patch.
Call a professional immediately if any of the following apply:
- The crack is wider than 1/2 inch at any point along its length
- Water seeps through the slab during or after rain
- Doors or windows near the slab have started sticking
- The crack runs diagonally across a load-bearing wall or foundation footing
- A musty smell has developed in a basement near the cracked area
Tools and Materials for Concrete Crack Repair
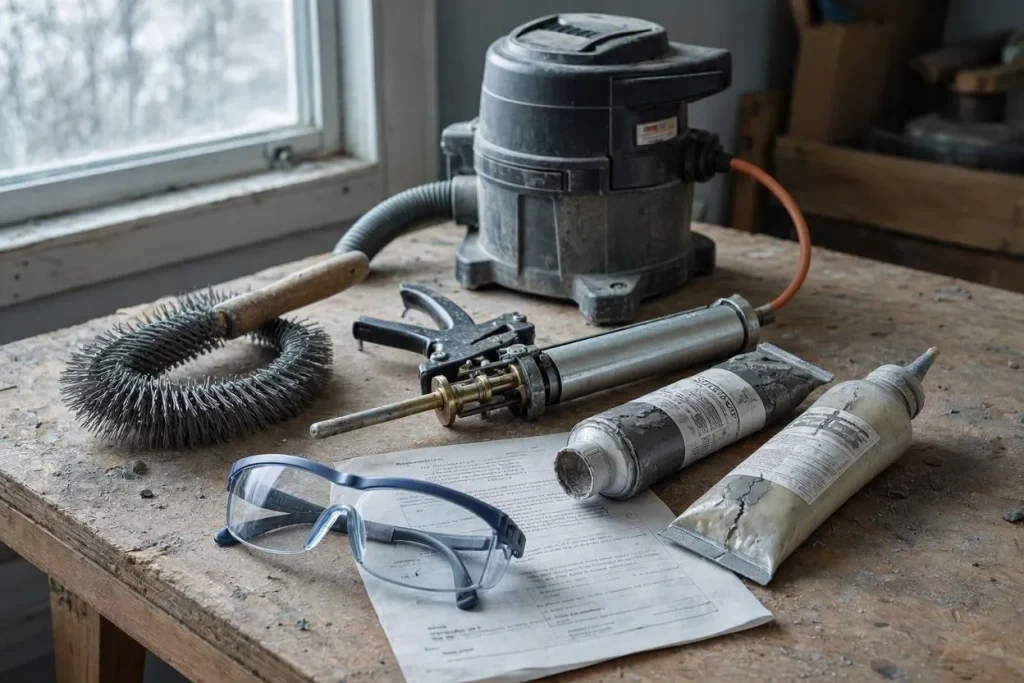
A basic concrete crack repair kit includes a wire brush, a wet/dry vacuum, a caulking gun, crack filler or patching compound, and safety glasses. Every repair, whether the crack is a hairline or a half-inch gap, starts with the same prep tools before the materials diverge based on size.
For narrow cracks, gather a wire brush to loosen debris, a shop vacuum to clear dust, a caulking gun to dispense pourable or gel-based filler, and a putty knife to smooth the surface. Wider cracks call for more gear: a masonry chisel and hammer to undercut the edges into an inverted V-shape, a foam backer rod sized to the crack’s depth, a paintbrush for bonding adhesive, and a trowel for pressing patching compound into place. Safety glasses matter more than most homeowners expect, since chiseling concrete throws small fragments at eye level, and work gloves protect your hands from both the chisel and from epoxy or polyurethane products that irritate bare skin.
How Do You Fix Narrow Cracks in a Concrete Slab?
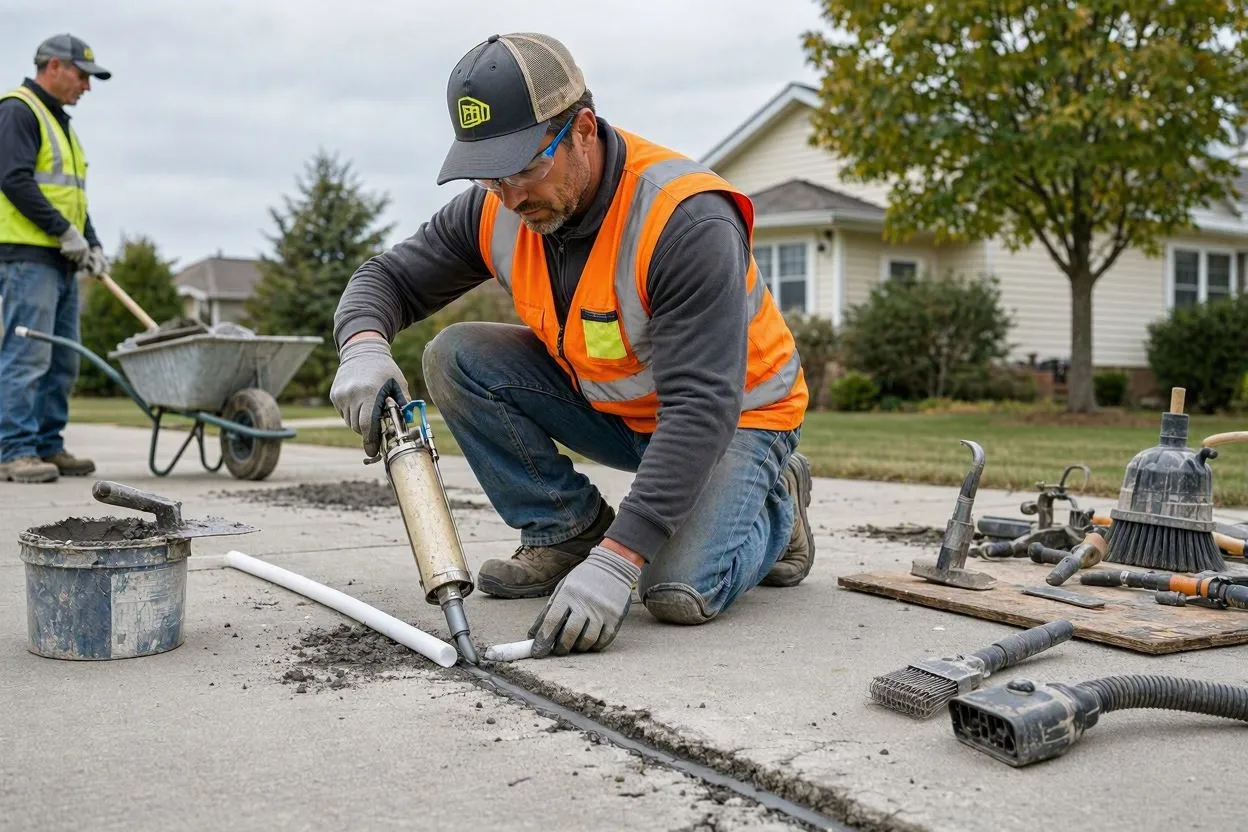
Fix narrow concrete cracks, anything under 1/4 inch wide, in three steps: clean the crack, fill it with a pourable or gel crack filler, and smooth the surface before it cures. This works for hairline cracks in driveways, garage floors, and patios, and takes most homeowners under an hour per crack.
Clean the crack
Scrub the length of it with a wire brush to loosen embedded dirt and old caulk residue, then vacuum out the debris with a wet/dry vac. Skipping this step is the single most common reason DIY crack fillers fail within a year, since the filler ends up bonding to loose material instead of solid concrete.
Fill the crack
Load a pourable, self-leveling crack filler or a gel-based product into a caulking gun, then run a steady bead along the entire crack from one end to the other. Self-leveling products flow into the gap on their own; gel formulas need manual pressing with a putty knife to reach full depth.
Smooth and cure
Press the filler flush with the surrounding surface using a putty knife or a wet finger, then let it cure fully before walking or driving on the repair. Most narrow-crack fillers reach a workable skin in 20 to 40 minutes but need a full 24 hours before they can handle vehicle traffic.
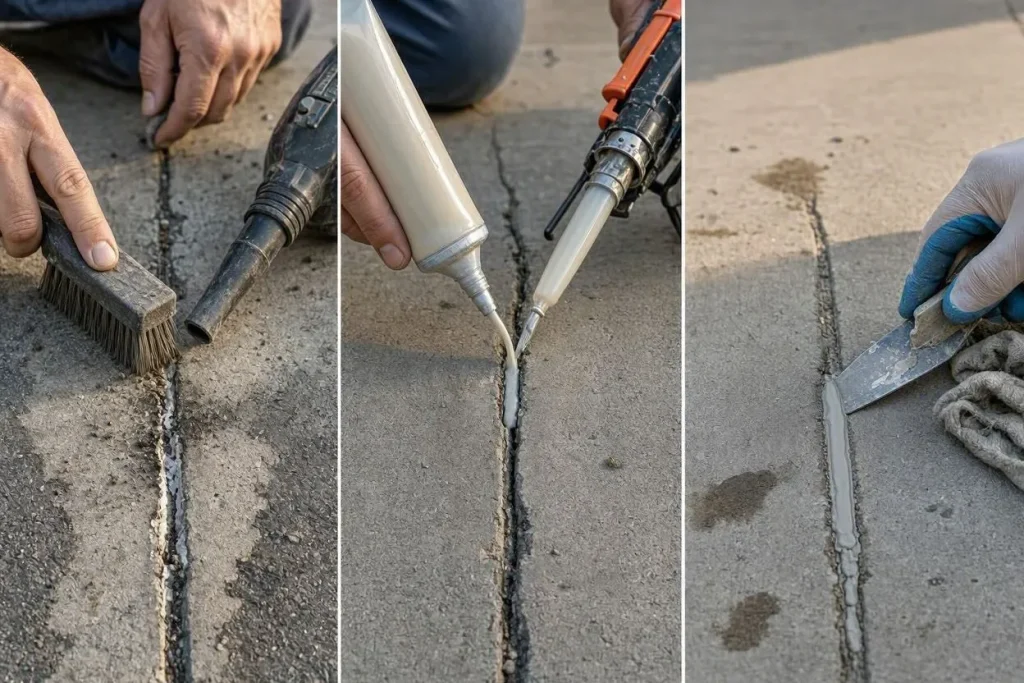
A driveway with three or four hairline cracks scattered across its surface, a common sight on concrete poured more than eight years ago, usually takes about 90 minutes to fix start to finish with this method.
How Do You Fix Wide Cracks in a Concrete Slab?
Fix wide concrete cracks, 1/2 inch or wider, by undercutting the edges, inserting a backer rod, applying bonding adhesive, and packing the gap with patching compound. Wide cracks need more prep than narrow ones because the goal shifts from sealing a gap to rebuilding structural continuity across it.
Undercut the crack
Use a masonry chisel and hammer to widen the base of the crack slightly more than the surface opening, creating an inverted V-shape that gives the patching material something to grip. Clear away all loose debris with a wire brush and vacuum once the chiseling’s done.
Insert a backer rod
For cracks deeper than 1/2 inch, press a flexible foam backer rod into the gap before adding any patching material. The rod controls how deep the compound sits and keeps you from wasting material that would otherwise sink too far into the crack.
Apply bonding adhesive
Brush a thin coat of latex bonding adhesive onto the exposed concrete inside the crack. This helps the new patching compound fuse to the old slab instead of just sitting on top of it.
Pack the patching compound
Mix a vinyl-reinforced patching compound according to the manufacturer’s directions, then press it into the crack with a trowel, working in layers if the crack runs deeper than 1 inch. Smooth the final layer flush with the surrounding concrete.
Cure for several days
Wide-crack repairs typically need three to seven days of cure time before they can bear weight, depending on temperature and the product used. A garage floor crack repaired with a two-part epoxy compound often reaches full compressive strength in five days at 70°F, but that can take twice as long in colder weather.
Is It a Crack or an Expansion Joint?
Not every gap in a concrete slab is a crack. Straight, evenly spaced lines with a consistent width are expansion joints, installed on purpose. Confusing the two leads homeowners to waste money filling joints that were never meant to be sealed the way a crack is.
Expansion joints get cut into a slab during or shortly after the pour, usually every 8 to 12 feet on driveways and every 4 to 6 feet on sidewalks, to control where the concrete is allowed to move as it expands and contracts with temperature. A joint runs in a perfectly straight line, holds the same width along its entire length, and often has a slightly rounded or tooled edge. A crack follows an irregular path, varies in width, and sometimes branches into smaller hairline offshoots. Joints do need periodic resealing with a flexible joint sealant every five to ten years to keep water out, but that’s a different product and process from the crack fillers and patching compounds used on true cracks.
Which Repair Material Works Best for Each Crack Type?
Choose epoxy for load-bearing structural cracks, polyurethane foam for cracks with water infiltration, and mortar or vinyl patching compound for wide cosmetic cracks. Each material solves a different problem, and picking the wrong one is the most common reason DIY concrete repairs fail within two years.
| Material | Best For | Cure Time | Cost Range | Durability |
| Epoxy injection | Structural cracks, load-bearing surfaces | 24–72 hours | 8–50 per crack (DIY kit) | Stronger than surrounding concrete; permanent |
| Polyurethane foam | Cracks with active water seepage | 15 minutes–1 hour (expands fast) | 15–60 per crack | Flexible; handles slab movement well |
| Vinyl patching compound | Wide cosmetic cracks (1/2 inch+) | 3–7 days | 10–25 per bag | Good; less flexible than epoxy or polyurethane |
| Concrete caulk (Sikaflex-type) | Narrow cracks under 1/4 inch | 1–2 hours to light traffic; 3–5 days full cure | 8–20 per tube | Flexible; ideal for driveways and patios |
| Mortar mix | Large structural gaps, steps, edges | 24–48 hours | 10–15 per bag | Strong but rigid; can re-crack under movement |
Epoxy works because its tensile strength ends up exceeding that of the surrounding concrete once cured, so the repaired section actually becomes stronger than the original material around it. Polyurethane foam takes the opposite approach: it stays flexible so it can move with the slab instead of cracking again under the same stress that caused the damage in the first place.
How to Fix a Cracked Concrete Slab by Surface Type
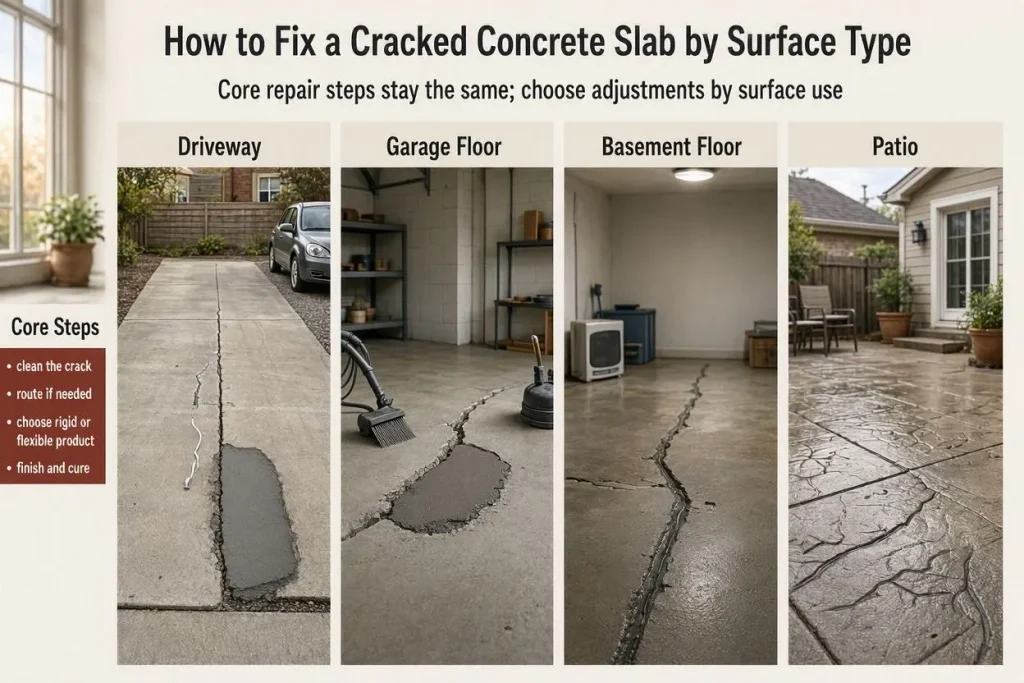
The core repair steps stay the same across surfaces, but driveways, garage floors, basement floors, and patios each need a specific adjustment based on how the surface gets used.
Driveways carry vehicle weight daily, so cracks wider than 1/4 inch do better with a more rigid patching compound rather than a purely flexible caulk. If your household only has one car, repair one side of a two-car driveway at a time, since most patching compounds need three to five days before they can support tire weight.
Garage floors often develop cracks near the slab’s control joints or along the path where a vehicle’s tires cross daily. A two-part epoxy filler works especially well here because garage floors need to resist oil stains and chemical exposure that a simple caulk just can’t handle. Sand the repaired area lightly with 120-grit sandpaper once it’s cured if the floor will be coated or sealed afterward, so the coating adheres evenly.
Basement floors raise the stakes. Water infiltration through a crack can lead to mold growth within 24 to 48 hours of a slab getting wet, and polyurethane foam injection is the preferred material here specifically because it expands into the full depth of the crack and blocks water from re-entering, unlike surface-level caulk that only seals the visible portion.
Patios see less weight than driveways but more foot traffic, along with exposure to garden soil, tree roots, and standing water from planters. Check for nearby tree roots before repairing a patio crack. A root growing under the slab will crack the repair again within a season, no matter which material you use.
How Much Does It Cost to Fix a Cracked Concrete Slab?
A DIY concrete crack repair typically costs between $10 and $100 in materials, while professional repair runs $300 to $1,500 depending on crack severity and method. Cost scales directly with crack width, depth, and whether the underlying cause requires soil stabilization.
Basic crack fillers and caulk tubes for narrow, cosmetic cracks cost $8 to $20 each, and a homeowner with three or four hairline cracks across a driveway can knock out the whole job for under $75 in materials. Epoxy injection kits for structural cracks run $30 to $60 and typically cover one crack up to 4 feet long. Professional epoxy injection service, including site inspection, costs $400 to $800 for a single crack in most U.S. markets. Polyurethane foam injection for basement floor cracks with active water seepage costs more, often $600 to $1,500 professionally, because the process needs specialized injection equipment and pressure control that DIY kits can’t replicate.
If a slab shows widespread cracking tied to soil settlement, resurfacing or slab replacement becomes more cost-effective than repeated patching. Resurfacing a standard two-car driveway runs $3 to $7 per square foot, while full slab replacement costs $8 to $18 per square foot depending on region and slab thickness.
When Is the Best Time of Year to Repair Concrete Cracks?
Late spring through early fall, when daytime temperatures stay between 50°F and 90°F (10°C and 32°C), gives concrete crack repairs the best shot at curing properly. Most caulks, epoxies, and patching compounds need ambient temperatures in this range to bond and set without cracking again during the cure.
Cold weather slows curing way down and can keep some products from bonding at all. Polyurethane foam, for instance, may not expand fully if applied below 40°F. Extreme summer heat above 95°F causes the opposite problem, since some fast-setting compounds skin over before they’ve actually filled the crack. If you’re in a region with real winters, like the Midwest or Northeast, you get the widest repair window between April and October. Someone in a warmer climate like the Southeast or Southwest can often repair cracks nearly year-round, except during the hottest weeks of July and August.
Does Homeowners Insurance Cover a Cracked Concrete Slab?
No. Standard homeowners insurance rarely covers cracked concrete slabs, since most policies treat foundation cracking as gradual wear rather than a sudden, covered event. Coverage only kicks in under specific circumstances tied to a named peril in the policy.
A crack caused by a burst pipe, a sudden sinkhole, or storm-related flooding may qualify for coverage, because those count as sudden and accidental damage under most standard policies. A crack that developed slowly from soil settlement, shrinkage, or normal freeze-thaw cycles rarely qualifies, since insurers treat that as a maintenance issue the homeowner should have caught earlier. If you’re not sure what caused the crack, call your insurance provider before starting any repair work. Documenting the damage with photos and a written inspection report before repair strengthens any future claim.
When Should You Call a Foundation Specialist?
Call a foundation specialist if a crack exceeds 1/2 inch in width, shows vertical displacement, leaks water consistently, or keeps widening despite a completed repair. A licensed specialist brings diagnostic tools, like laser levels and moisture meters, that most homeowners don’t have.
A crack that reappears in the same spot within six months of a DIY repair points to an active underlying cause, whether that’s soil movement, hydrostatic pressure, or a structural load issue, and cosmetic filler can’t fix that on its own. Foundation specialists also carry warranties on their work, often five to twenty-five years depending on the method used, which no DIY repair can offer. Get a second opinion from a structural engineer before committing to expensive foundation work, like slab piers or wall anchors. It protects you from paying for repairs your home doesn’t actually need.
Conclusion
Fixing a cracked concrete slab comes down to matching the repair method to the crack’s width and cause, rather than grabbing whatever product happens to be on the hardware store shelf. Narrow, cosmetic cracks under 1/4 inch respond well to a simple caulk-and-smooth approach that costs under $20 and takes less than an hour. Cracks approaching 1/2 inch, showing displacement, or leaking water need the more involved undercut-and-patch method, or in some cases a call to a licensed foundation specialist before any patching starts. A driveway, garage floor, basement slab, and patio each call for a slightly different material, but the underlying decision tree stays the same: measure the crack, check for movement over 30 days if the cause isn’t clear, and pick epoxy, polyurethane, or vinyl compound based on whether you’re after structural strength, water resistance, or a cosmetic fix.
FAQs

Related Posts