How to Fix Cracks in Concrete Driveway: Full DIY Guide
Driveway crack repair is one of the most common home improvement projects a homeowner takes on, and most cracks are fixable on their own, as long as you match the repair to the crack’s width and the slab underneath is stable. But the fix for a hairline crack that showed up while the concrete was curing is nothing like the fix for a half-inch gap sitting next to a sunken corner, and getting that diagnosis wrong usually means redoing the repair within a season.
This home improvement guide covers every crack type you’re likely to run into around the house, what each one actually calls for, and where a DIY driveway repair stops making sense and a home improvement contractor is worth calling.
Understanding Driveway Cracks
What Causes Cracks in a Concrete Driveway?
Four things do most of the damage: shrinkage while the concrete cures, freeze-thaw cycles, tree roots, and heavy vehicles parked on an unstable base. Shrinkage cracks tend to show up in the first year, often as fine spider-web lines called crazing. In cold-winter cities that see dozens of freeze-thaw cycles a season, water that gets into a crack and refreezes can widen it a little more each winter. A tree planted close to the slab edge can lift and split concrete within roughly a decade as its roots spread. Park a pickup at the same spot on an eroded sub-base long enough, and that section eventually snaps.
There’s a fifth cause: bad installation. Adding too much water to the concrete mix weakens it well below spec, and a slab poured that way cracks sooner, and more often, than one mixed correctly.
How Do You Diagnose a Crack Before Repairing It?
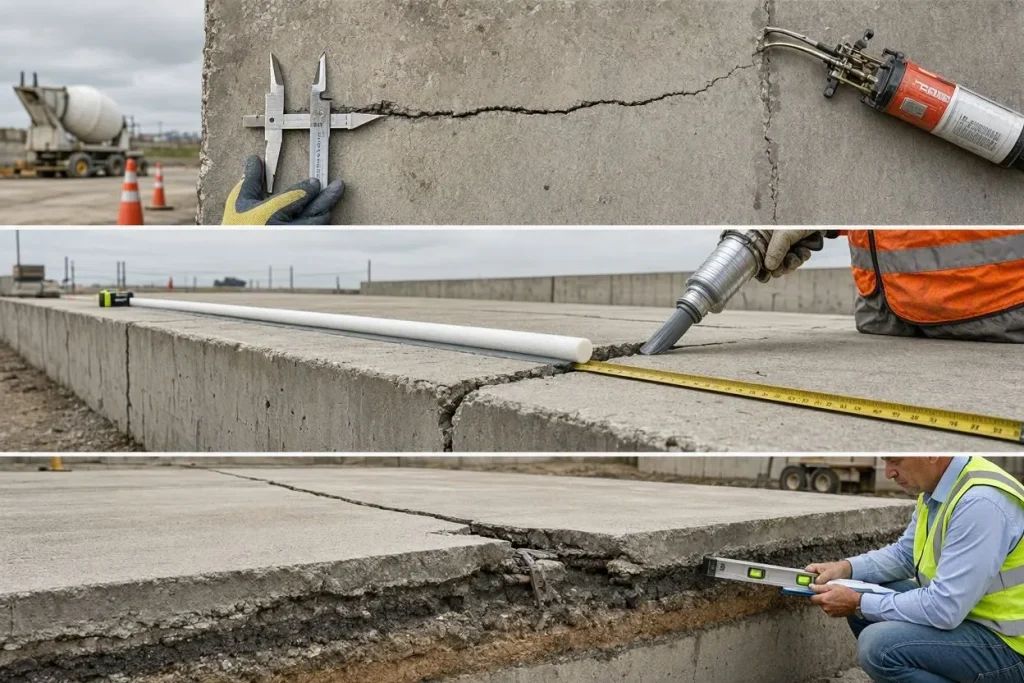
Measure the width, then check whether one side sits higher than the other. That second part matters more than people think.
- Under 1/4 inch: cosmetic. Sealant or filler handles it.
- 1/4 inch to 1/2 inch: usually fine with backer rod and sealant, though a crack that runs the full length of the slab is worth a closer look.
- Over 1 inch, with uneven surfaces on either side: probably structural. Likely a failed sub-base or foundation movement.
A crack that’s higher on one side, even by just 1/8 inch, points to soil settling underneath rather than ordinary shrinkage. That changes everything about the fix. A quick test: slide a quarter into the crack. If it sits flush or drops in without resistance, you’re looking at roughly 3/4 inch or wider, and you’re in replacement territory rather than patch territory.
Getting Ready to Repair
What Tools and Materials Do You Need?
Like most home repair jobs, this one comes down to having the right supplies on hand before you start. A basic driveway crack repair kit, the kind sold at any home improvement store, runs $40 to $120 and covers most narrow-to-moderate cracks:
- Pressure washer (2,000 to 3,000 PSI)
- Masonry chisel and hammer
- Wire brush
- Shop vacuum or leaf blower
- Caulk gun
- Backer rod (for cracks over 1/4 inch)
- Concrete crack filler or polyurethane sealant
- Trowel and putty knife
- Rubber gloves and safety glasses
- Kneepads
A single 10-ounce tube of self-leveling sealant covers 15 to 20 linear feet, which is plenty for a driveway with a handful of scattered hairline cracks. Wider cracks need a bucket-mixed patching compound instead. That runs $18 to $35 per 40-pound bag and covers roughly 8 to 12 linear feet at a 1-inch depth.
Repair Methods by Crack Type
How to Fix Hairline Cracks and Crazing
Skip the crack-by-crack approach here. A thin-coat resurfacer over the whole surface is faster and works better. Crazing happens when the top layer of concrete dries faster than the layer underneath, usually because the slab cured in direct sun without any moisture control. These cracks rarely go deeper than the surface skin, so filling each one by hand is mostly wasted effort.
Start by pressure washing the driveway at 3,000 PSI or higher, working in overlapping passes. Mix the resurfacer per the package, usually one bag to a gallon and a half of water. Pour it onto a 4-by-4-foot section and spread it with a long-handled squeegee at a 45-degree angle, then move on within about 10 minutes since most resurfacers set up fast once the weather’s warm. Working alone, you can typically resurface a two-car driveway (around 600 square feet) in 3 to 4 hours.
How to Fill Narrow Cracks (Up to 1/4 Inch)
Use a flexible polyurethane or polymer sealant straight from a caulk gun. Flexibility matters more than raw strength, since concrete measurably expands and contracts with temperature swings. A rigid filler cracks again within a year. A flexible one moves with the slab instead of fighting it.
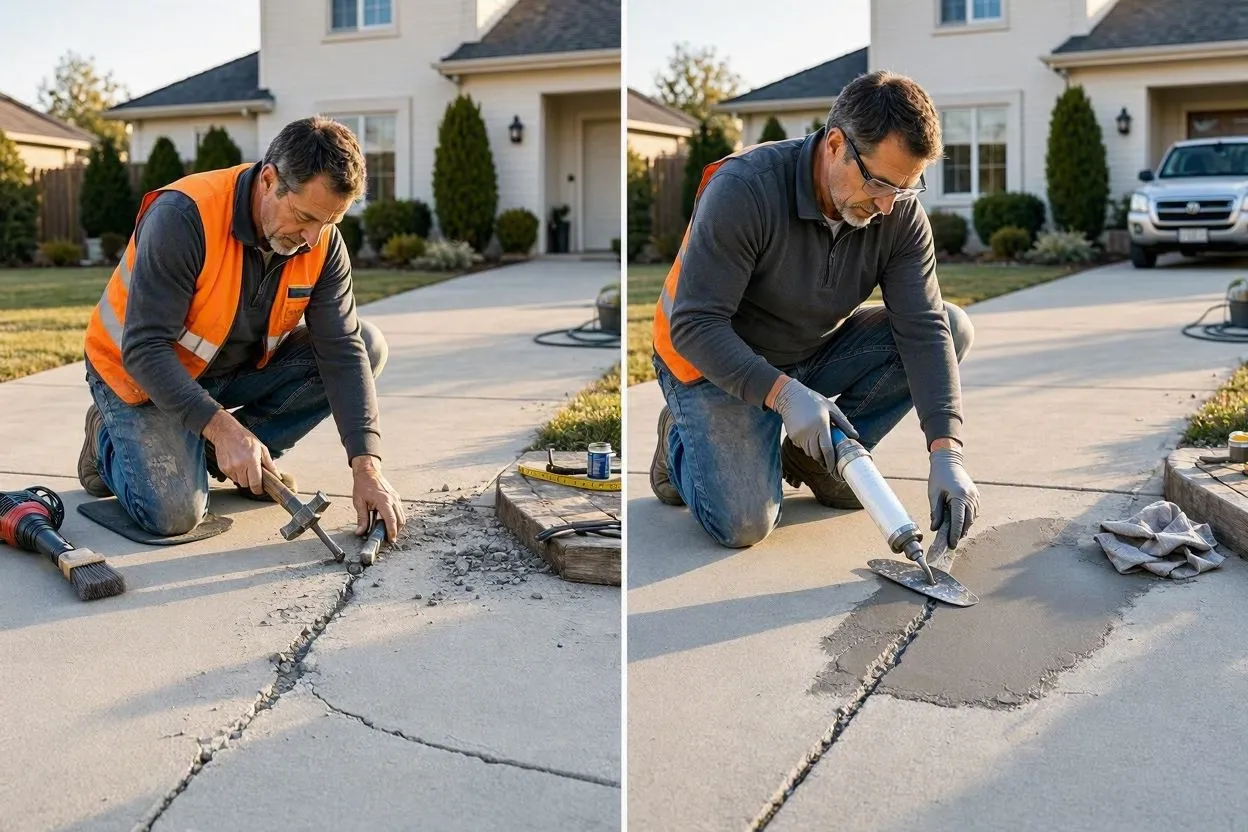
If a crack is narrower than 1/8 inch, widen it first with a chisel, angling the cut into a shallow V so the filler has more surface to grip. Vacuum out the debris and let it dry, which takes 2 to 4 hours in direct sun or up to a full day in shade. Run a steady bead of sealant along the crack, slightly overfilling it, then smooth it with a wet finger or a putty knife dipped in soapy water. Most polyurethane sealants are dry to the touch within an hour and fully cured in 24 to 72 hours, so keep vehicles off that spot for at least a day.
How to Repair Wide Cracks (1/4 Inch to 1 Inch)
Pack the crack with backer rod before you touch sealant or patching compound. Backer rod is a foam cylinder, sold in diameters from 1/4 inch to 1 inch, and it fills the depth of the crack so the sealant only has to bridge the top inch or so. Skip it and the sealant just sinks into the gap without ever building enough thickness to hold.
Undercut both sides of the crack with a chisel to form an inverted V. That locks the patch in mechanically once it cures. Push the backer rod in with a putty knife until it sits about 1/2 inch below the surface, then mix a concrete patching compound (one with fine gravel, if the crack’s over 1/2 inch) and press it in with a trowel. For anything deeper than 2 inches, build it up in layers, letting each one set for about 30 minutes before adding the next. A 3/8-inch crack running the full 20-foot width of a two-car garage apron would need roughly two 40-pound bags.
How to Fix Cracks Along the Driveway Edge
Clean out the crumbled section and rebuild it with quick-setting cement mixed with acrylic fortifier. Edge damage shows up most often where a tire rides close to the slab boundary, since that spot gets the least support from the surrounding concrete, and the fix is different from a mid-slab crack because you’re reconstructing a broken corner rather than sealing a gap.
Chip away everything loose with a hammer and chisel until you hit solid concrete on all sides. Mix the cement with fortifier at the ratio on the bag, usually about 1 part fortifier to 4 parts water, and apply it in 1/2-inch layers with firm trowel pressure. It sets in 5 to 7 minutes, so shape the final layer to match the original edge profile before it hardens. If a corner’s broken off entirely, clamp a wood form against the slab to hold the wet mix in shape while it cures.
How to Repair a Separated Control Joint
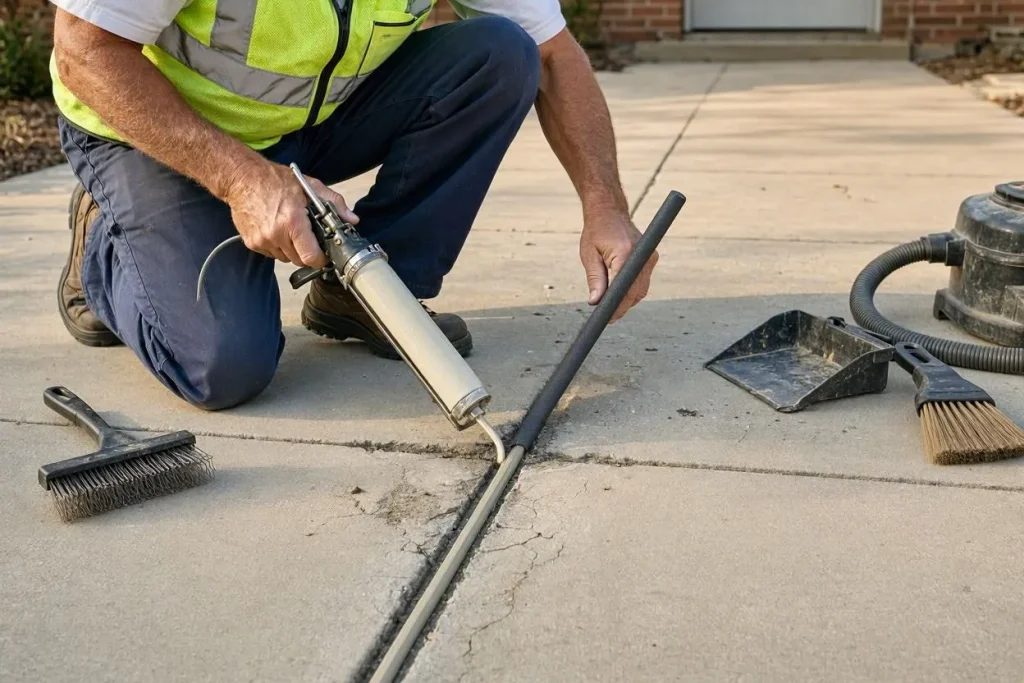
Fill the gap with self-leveling polyurethane sealant, adding backer rod first if the joint is wider than 1/2 inch. Control joints are the straight, shallow grooves cut into a driveway every 8 to 10 feet during installation, and cracking along one of these lines isn’t a defect. It’s the joint doing its job: directing random shrinkage cracks into a predictable, hidden line instead of letting them show up wherever they want.
Clean the joint with a wire brush and vacuum out the packed dirt and old sealant. Add backer rod if the gap’s over 1/2 inch, then pour self-leveling sealant straight from the container spout, letting it settle flush on its own. Unlike non-sag caulk, this stuff levels itself within a few minutes; no troweling needed. A refilled control joint keeps weeds and standing water out while still doing its original job of controlling where future cracks form.
Repair vs. Replace, Cost, and Upkeep
When Should You Replace the Driveway Instead of Repairing It?
Replace the driveway, or at least the damaged section, if cracks run over an inch wide, follow a jagged and uneven pattern, or sit next to a section that’s visibly higher or lower than the rest of the slab. Those are signs of a failed sub-base or shifting foundation, not surface shrinkage, and no filler fixes a support problem from above.
Expansive clay soil, common across parts of Texas and Colorado, can heave a driveway by an inch or more during wet-to-dry seasonal swings, and that kind of movement breaks a surface patch within months. Replacing just the damaged section rather than the whole driveway costs less and holds up fine, as long as the rest of the slab checks out: no hollow drumming sound when you tap it with a hammer, no crumbling edges, no new cracking within 10 feet of the damaged zone.
How Much Does It Cost to Fix Cracks in a Concrete Driveway?
Costs below are rough US national averages as of 2026 and vary by region and contractor, get local quotes before budgeting.
DIY materials run $50 to $250 for most homes. Hiring a contractor for the same repair costs $300 to $1,200, depending on how bad the cracking is and how big the driveway is. A single tube of polyurethane sealant handles a handful of hairline cracks for under $15. A full resurfacing job on a 600-square-foot driveway needs about 15 to 18 bags of resurfacer at $20 to $30 each, so DIY materials land somewhere in the $300 to $540 range before you count your own labor.
Contractors typically charge $3 to $10 per linear foot for crack repair and $2 to $5 per square foot for resurfacing. Full replacement runs $6 to $12 per square foot in most US metro areas, putting a standard two-car driveway replacement between $3,600 and $7,200. If you’re staring at three or four narrow cracks, doing it yourself saves real money. If you’re staring at structural damage across a 400-square-foot slab, paying a contractor once usually beats patching the same spot every year for the next five.
How Do You Prevent Cracks From Coming Back?
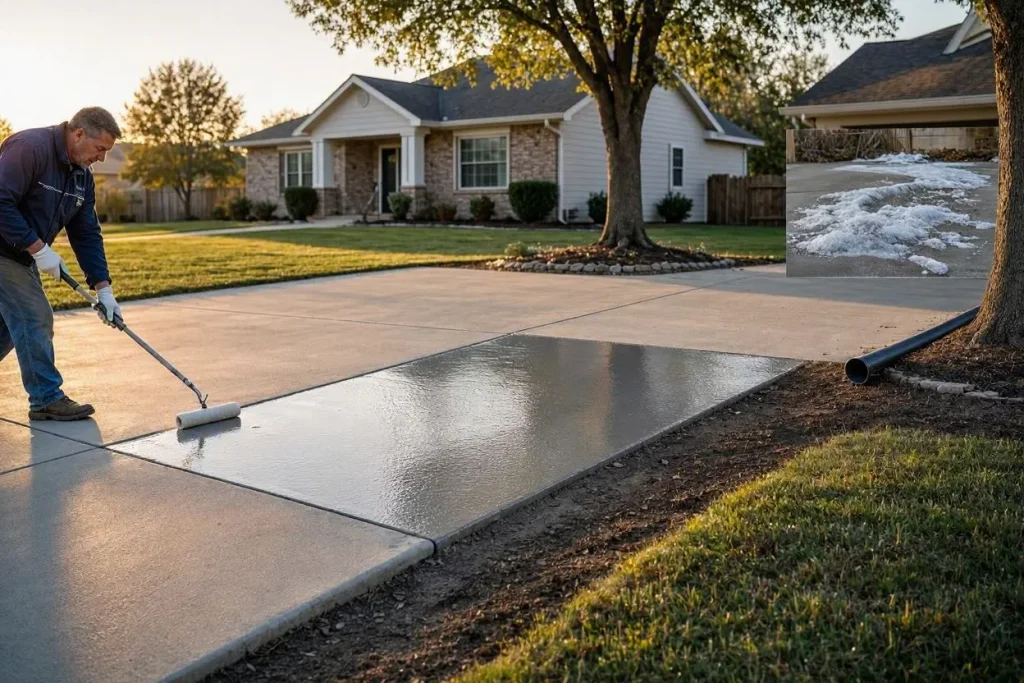
Seal the surface every 2 to 3 years, keep tree roots at least 10 feet from the slab edge, and point gutter downspouts away from the driveway base. A good silicone-based sealer keeps water out, which is what matters most in freeze-thaw climates, where trapped moisture does the real damage over winter.
Grade the soil around the driveway so water runs away from the slab instead of pooling against it. Skip the rock salt for ice control. Sodium chloride speeds up surface scaling on concrete less than a year old, and it wears down older slabs too. Calcium magnesium acetate is a less corrosive option for winter de-icing. A driveway that’s sealed on schedule and kept clear of tree roots can go 15 to 20 years before it needs any structural repair at all.
Conclusion
Like any home improvement project, driveway crack repair comes down to matching the fix to the actual problem. Match the repair to the crack’s actual width, and check for a height difference between the two sides before you pick up a trowel. Hairline cracks want resurfacer. Narrow gaps want flexible sealant. Anything wider than an inch with uneven edges points to a structural problem no filler will solve. Get the diagnosis right, use a backer rod on anything over a quarter inch, and reseal the whole surface every 2 to 3 years as part of your regular home maintenance routine. Do that, and a driveway stays functional for 15 years or more instead of turning into a yearly patch job.
FAQs

Related Posts