Basement Waterproofing Methods: How to Waterproof a Basement Without Wasting Money on the Wrong Fix
To waterproof a basement, start outside with gutters, downspouts, and grading, seal cracks inside, and add interior drainage with a sump pump if water rises through the floor. Exterior membrane work fits new construction or severe groundwater pressure. The right method depends on where water enters, and a single coating never fixes active seepage.
Key Takeaways
Basement waterproofing methods work as a system. Exterior water control stops water at the source, and interior drainage moves out the water that still gets in.
The best method depends on the leak source. Cracks need crack repair, floor seepage needs interior drainage and a sump pump, and groundwater pressure needs exterior work or drainage.
The cheapest fixes work first. Clean gutters, downspout extensions that discharge 4 to 6 feet from the house, and soil that drops about 6 inches over the first 10 feet fix most wet basements.
Interior sealants and paint do not hold back hydrostatic pressure. A coating helps with dampness through porous concrete, but it fails against active seepage.
An interior French drain with a sump pump averages about $3,000 to $8,000 installed, and a sump pump on its own runs $600 to $2,500, per SensibleDigs.
What Is Basement Waterproofing?
Basement waterproofing is the set of interior and exterior techniques that stop water from entering a basement or move water out before it damages the foundation, floors, and stored items. Basement waterproofing methods include grading, gutters, crack repair, sealants, interior drainage, sump pumps, vapor barriers, and exterior membranes, and the right choice depends on where water enters the house.
Concrete is porous. Block walls have mortar joints. Every pipe, wire, and window penetration creates a path for water. Basement waterproofing accepts that reality and builds a system around it. The system has 2 jobs. The first job keeps water from reaching the foundation. The second job handles water that still reaches the foundation.
Waterproofing house foundations means stopping water at the wall or moving it out fast. Sealing and waterproofing are not the same thing. Sealing usually means a coating on a wall. Waterproofing means a system that stops entry or removes water. Damp proofing slows moisture through a wall during construction. Blue Umbrella Waterproofing calls wall sealing damp proofing, and calls a permanent interior drainage system true waterproofing. Paint on a wall wears down over time. A drainage system moves water every time it rains.
What Is the Best Basement Waterproofing Method?
The best basement waterproofing method is the method that matches the leak source in your house, and most dry basements need a combination of exterior water control and interior drainage. A crack needs crack repair, water rising through the floor needs an interior drain and a sump pump, and groundwater pressing on a wall needs exterior drainage or a membrane.
No single product fixes every wet basement. Basement waterproofing methods work best as a system, not as a single product. Luxcando lists 9 methods and states the same point. Interior drainage and a sump pump handle water that already gets in. An exterior membrane stops water at the wall. French drains, downspout extensions, and crack repair deal with runoff and leaks. Humidity needs its own fix. A guide that promises 1 product for all 5 problems is selling a product, not a solution.
Start with the source. Water through a crack points to crack repair. Water at the wall to floor joint points to hydrostatic pressure and interior drainage. Water after heavy rain points to gutters, grading, or downspouts. Musty air in summer with no rain points to condensation.
A finished basement raises the stakes. Framing, insulation, and drywall touch damp concrete in a finished room. Drainage matting, vapor barriers, and interior drains protect finished walls by giving water a path down to a drain instead of into framing. Plan that protection before you finish the walls.
Which Is the Cheapest Basement Waterproofing Method?
The cheapest basement waterproofing method is exterior water control, and gutter cleaning, downspout extensions, and regrading cost less than any drainage system or membrane. Clean gutters, downspouts that discharge 4 to 6 feet from the house, and soil that slopes away from the foundation fix most wet basements, and all 3 jobs use hand tools and low-cost materials.
SensibleDigs states the same order. Most wet basements improve with outside work first. The cheapest fixes are the ones that work most often. A clogged gutter dumps roof runoff at 1 corner of the foundation. A downspout that ends at the wall feeds the basement directly. Soil that tips back toward the house funnels every storm at the wall. Fix those 3 points before you buy a coating or a pump.
Interior sealants are the next cheapest option. A masonry waterproofer seals pores in concrete and helps with general dampness. Hydraulic cement plugs an active leak in minutes. Both cost far less than excavation. Both fail against hydrostatic pressure. Paint bubbles and peels when water pushes from behind the wall. Cement plugs a crack but does not stop pressure from the soil. Use sealants for dampness and small leaks, not for flooding or widespread seepage.
Cost alone misleads buyers. A cheap coating that fails in the next storm costs more than a drain that works. Compare methods by the problem they solve, not by the price tag alone.
How Do You Find Where Basement Water Is Coming From?
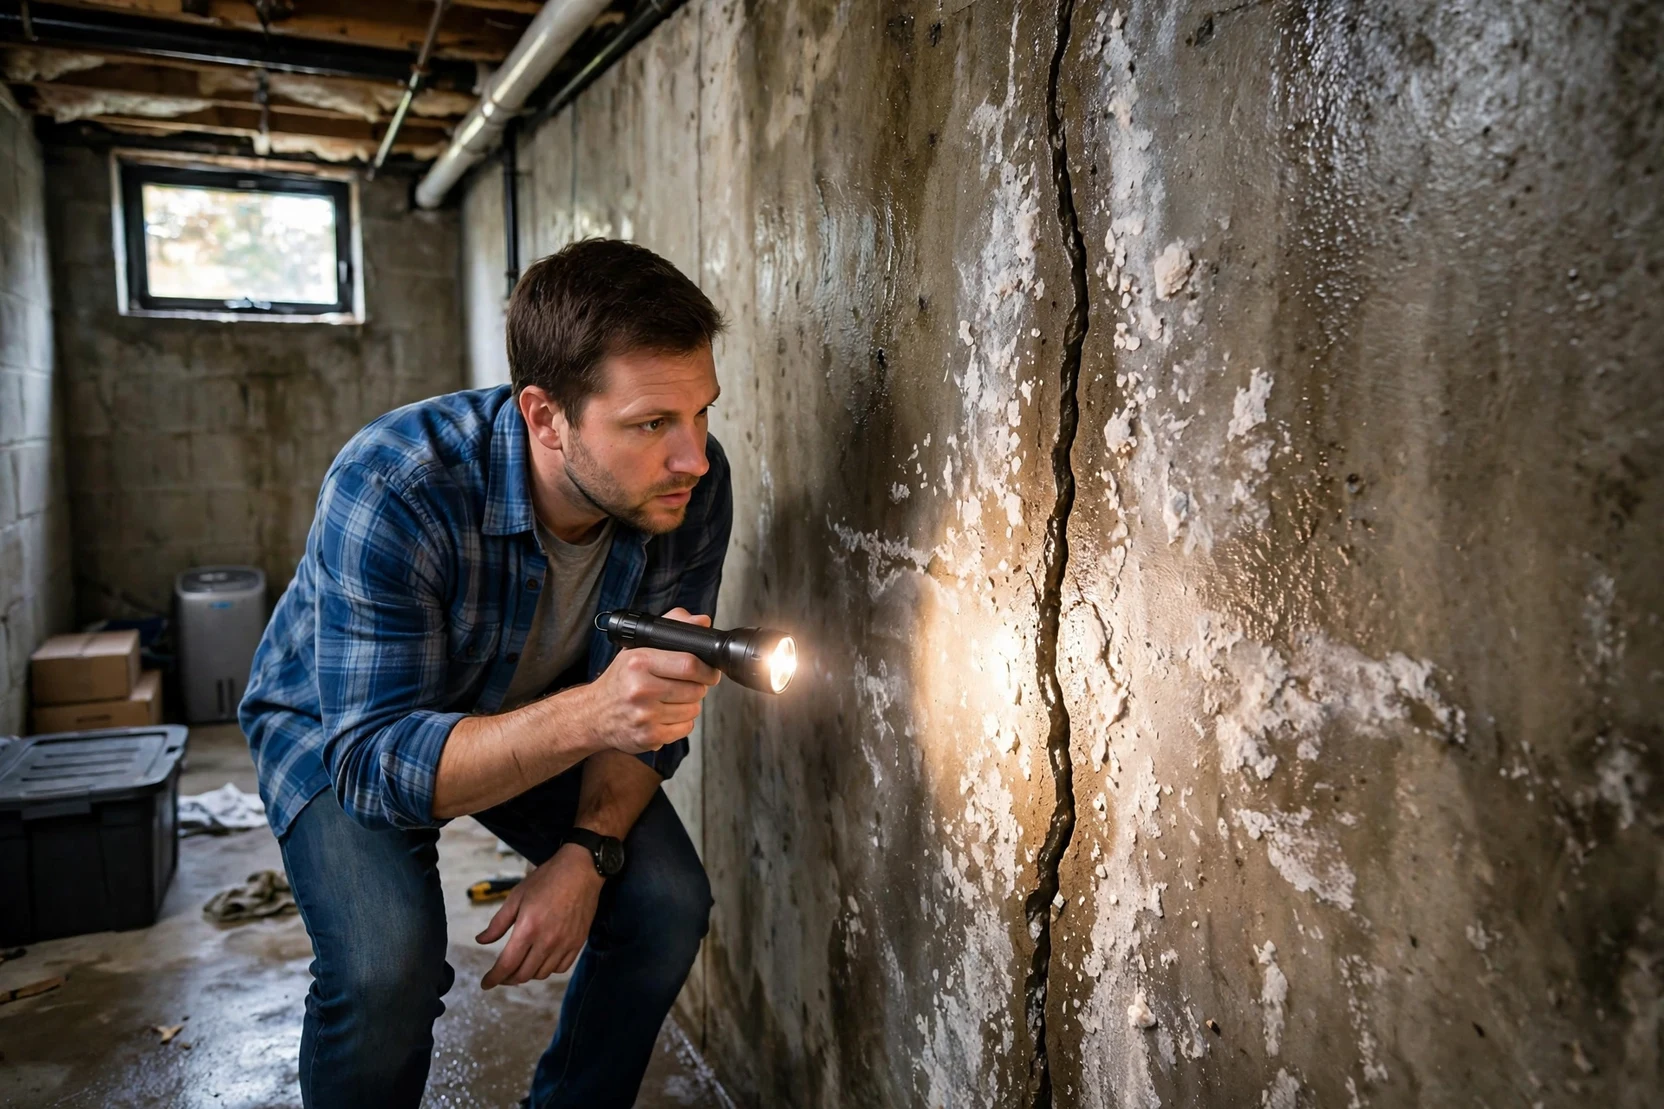
To find where basement water is coming from, inspect the walls and floor after rain, run a foil test on a wall, and log when the basement gets wet. Water on the underside of foil after 24 hours points to seepage through concrete, and water on the room side points to condensation, and each result points to a different fix.
Spend 1 evening on diagnosis before you spend money on a fix. Walk the basement during or right after rain. Note the exact spot and the pattern over 2 or 3 storms.
Use these 3 tests.
Tape a 1-foot square of aluminum foil to a dry wall section and leave it for 24 hours. Peel it off and read which side is wet. Water on the underside means seepage through concrete. Water on the room side means humid air is condensing on cold masonry.
Tape a 2-foot by 2-foot sheet of plastic to a bare wall or floor and seal all 4 edges. Moisture behind the plastic points to water coming through concrete. Moisture on the room side points to condensation. Repeat the test in 2 spots.
Draw a chalk line across a suspected crack or along the wall to floor seam. Check the line after the next rain. Moisture that starts on 1 side of the line points to a true entry path.
| Symptom | Likely cause | First method |
|---|---|---|
| Water through a single crack | Crack in poured concrete or block wall | Crack repair with epoxy or polyurethane injection |
| Water at the wall to floor joint | Hydrostatic pressure, high water table | Interior perimeter drain and sump pump |
| Water after heavy rain only | Gutters, downspouts, or grading | Clean gutters, extend downspouts, fix grade |
| Damp walls, musty air in summer, no rain link | Condensation and high humidity | Dehumidifier, pipe insulation, air sealing |
| Water in a window well | Window well drainage failure | Clear the well, add a cover, check the drain |
| White chalky powder on walls | Efflorescence, water passing through concrete | Find the seepage source, do not paint over it |
Efflorescence is the white chalky powder on concrete walls, mineral salt left behind after water passed through the wall and evaporated. SensibleDigs calls it proof of seepage, not a cosmetic stain.
How to Waterproof a Basement From the Inside
To waterproof a basement from the inside, seal cracks and penetrations first, apply a masonry coating for dampness, then install interior drainage and a sump pump if water rises through the floor. Interior methods manage water after it reaches the foundation, and they work best when exterior gutters and grading already move roof and surface water away from the house.
Interior work is the last line of defense, not the first. Interior methods handle dampness, condensation, and minor seepage well. They treat water that has already reached the wall. Use interior work after exterior work, not instead of it.
Crack Repair and Seam Sealing
Fix a specific leak path first. Hydraulic cement expands as it sets and locks into a gap. It stops an active leak in minutes. Mist the crack with water, press the cement deep into the gap, hold it in place until it sets, and let it cure.
Hairline cracks need a different tool. An epoxy or polyurethane injection kit fills a poured concrete crack with a flexible material that moves with the foundation. Polyurethane suits active leaks because it stays slightly flexible. Basement Systems warns that epoxy can crack when foundation walls expand and contract. Seal pipe penetrations with a flexible sealant made for concrete and masonry if the joint moves.
Interior Sealants and Coatings
Interior sealants create a moisture barrier on the inside of basement walls and floors. A masonry waterproofer seals pores in untreated concrete. Two coats are usually required for a proper seal. Prep matters more than the product. Remove efflorescence and loose material, strip old paint, and let the wall dry before you apply a coating.
Sealants help with minor water damage only. UltraTech Cement states the limit plainly. Interior sealants do not address the underlying cause of moisture. Blue Umbrella Waterproofing warns against Drylok and Flex Seal on basement walls. Paint traps moisture inside cinder block, mold grows between the paint layer and the wall, and removal later makes the real fix more expensive.
Interior Drainage and Sump Pumps
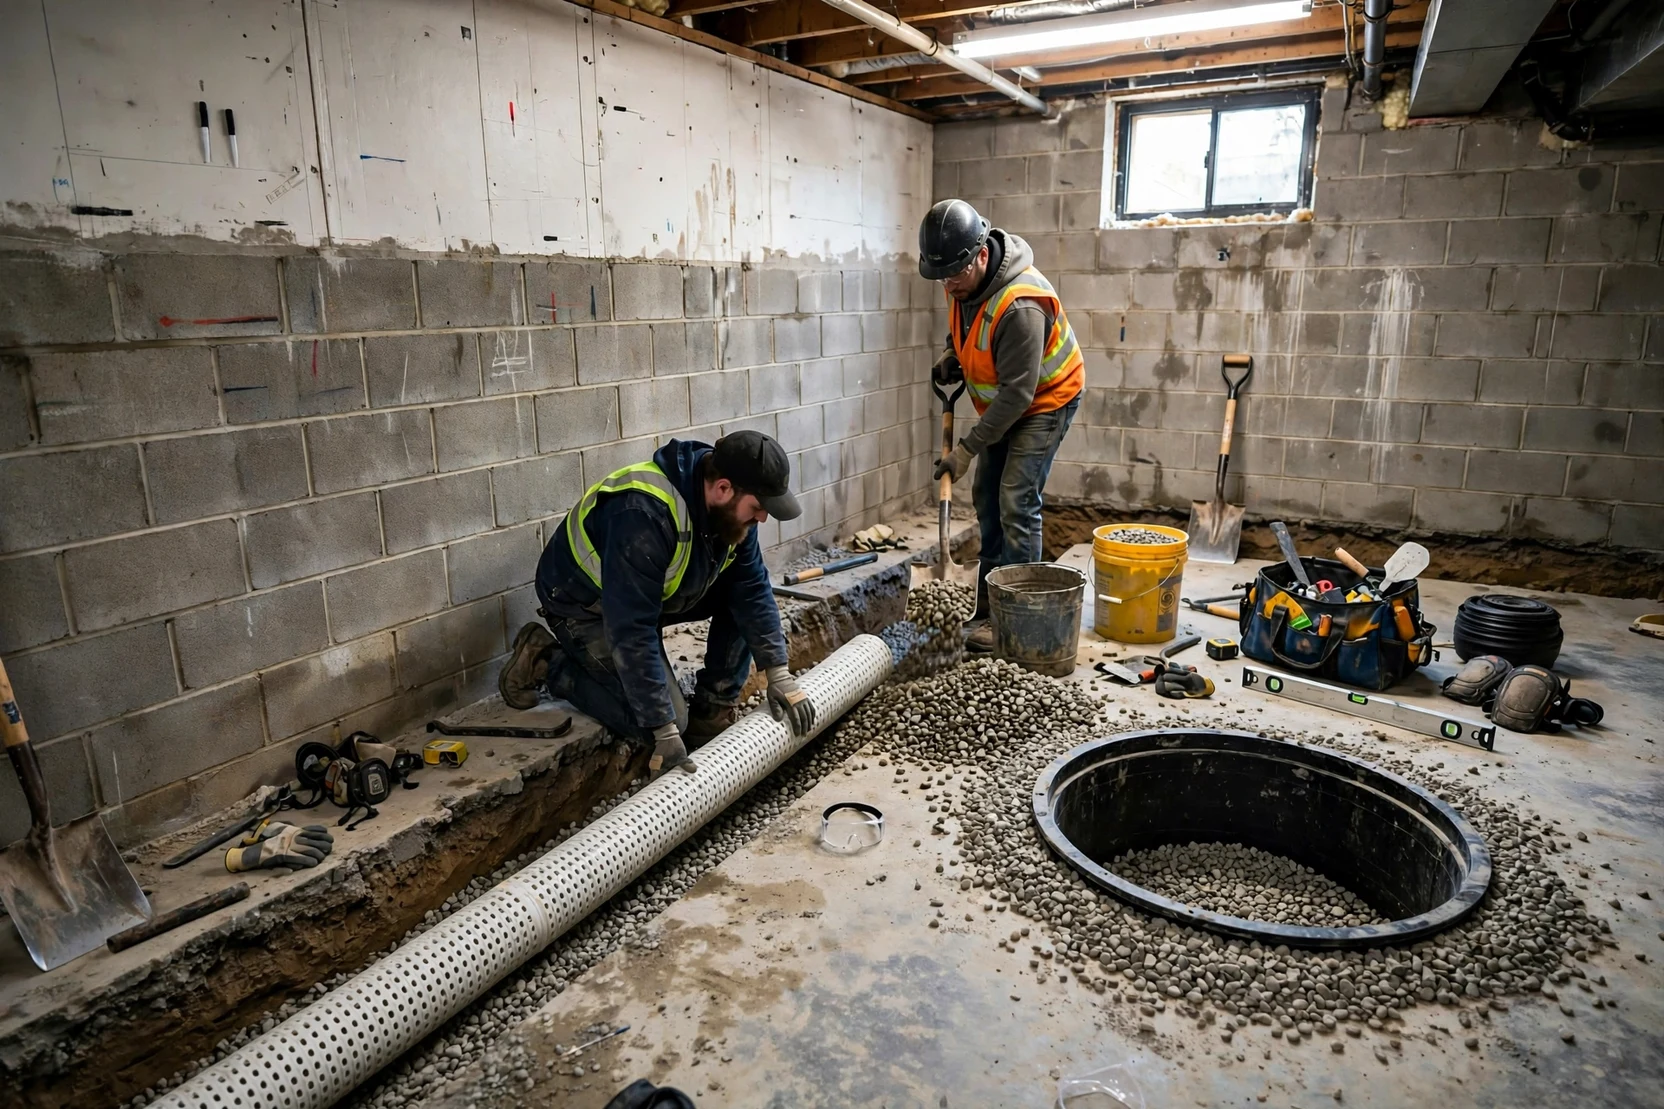
Interior drainage is the workhorse for floor seepage. A crew cuts a trench along the interior perimeter of the basement floor, installs perforated pipe in gravel, and covers the trench with fresh concrete. The pipe collects water from wall leaks and from the wall to floor joint. The water flows to a sump pit, where a pump with a float switch pumps water out of the house.
Basement Systems calls interior drainage the best option for most homes because it costs less and disrupts less than exterior excavation. Interior drains, perforated pipes along the interior perimeter, and a sump pump form 1 system. A pump alone does not stop water from entering. A drain alone does not remove water.
A basement waterproof system needs both a drain and a pump. Test the pump every month. Pour water into the pit and check that the float switch turns the pump on. A sealed sump lid cuts humidity and smell. A check valve stops water from draining back into the pit. A battery backup keeps the pump running during a power cut.
Vapor Barriers and Encapsulation
A vapor barrier limits moisture passing through a wall into the room. A heavy-duty barrier runs from top to bottom on the wall. Water that leaks behind the barrier runs down into the French drain underneath. Blue Umbrella Waterproofing uses a 16 mil vapor barrier for encapsulation.
Encapsulation combines an interior drainage system with a vapor barrier. Blue Umbrella calls the combination the strongest protection in its guide. A vapor barrier alone does not stop a leak. A drain alone does not stop dampness through a wall. Together they protect a finished basement.
How to Waterproof a Basement From the Outside
To waterproof a basement from the outside, expose the foundation wall, apply a waterproof membrane, add an exterior drain, and restore grading so water moves away from the house. Exterior work stops water before it enters the wall, and it fits new construction best, because the foundation is already open and accessible during building.
Exterior waterproofing is the most disruptive and often the most expensive option. Save full excavation for cases where the outside needs structural attention or water volume is extreme.
Excavation and Membrane Installation
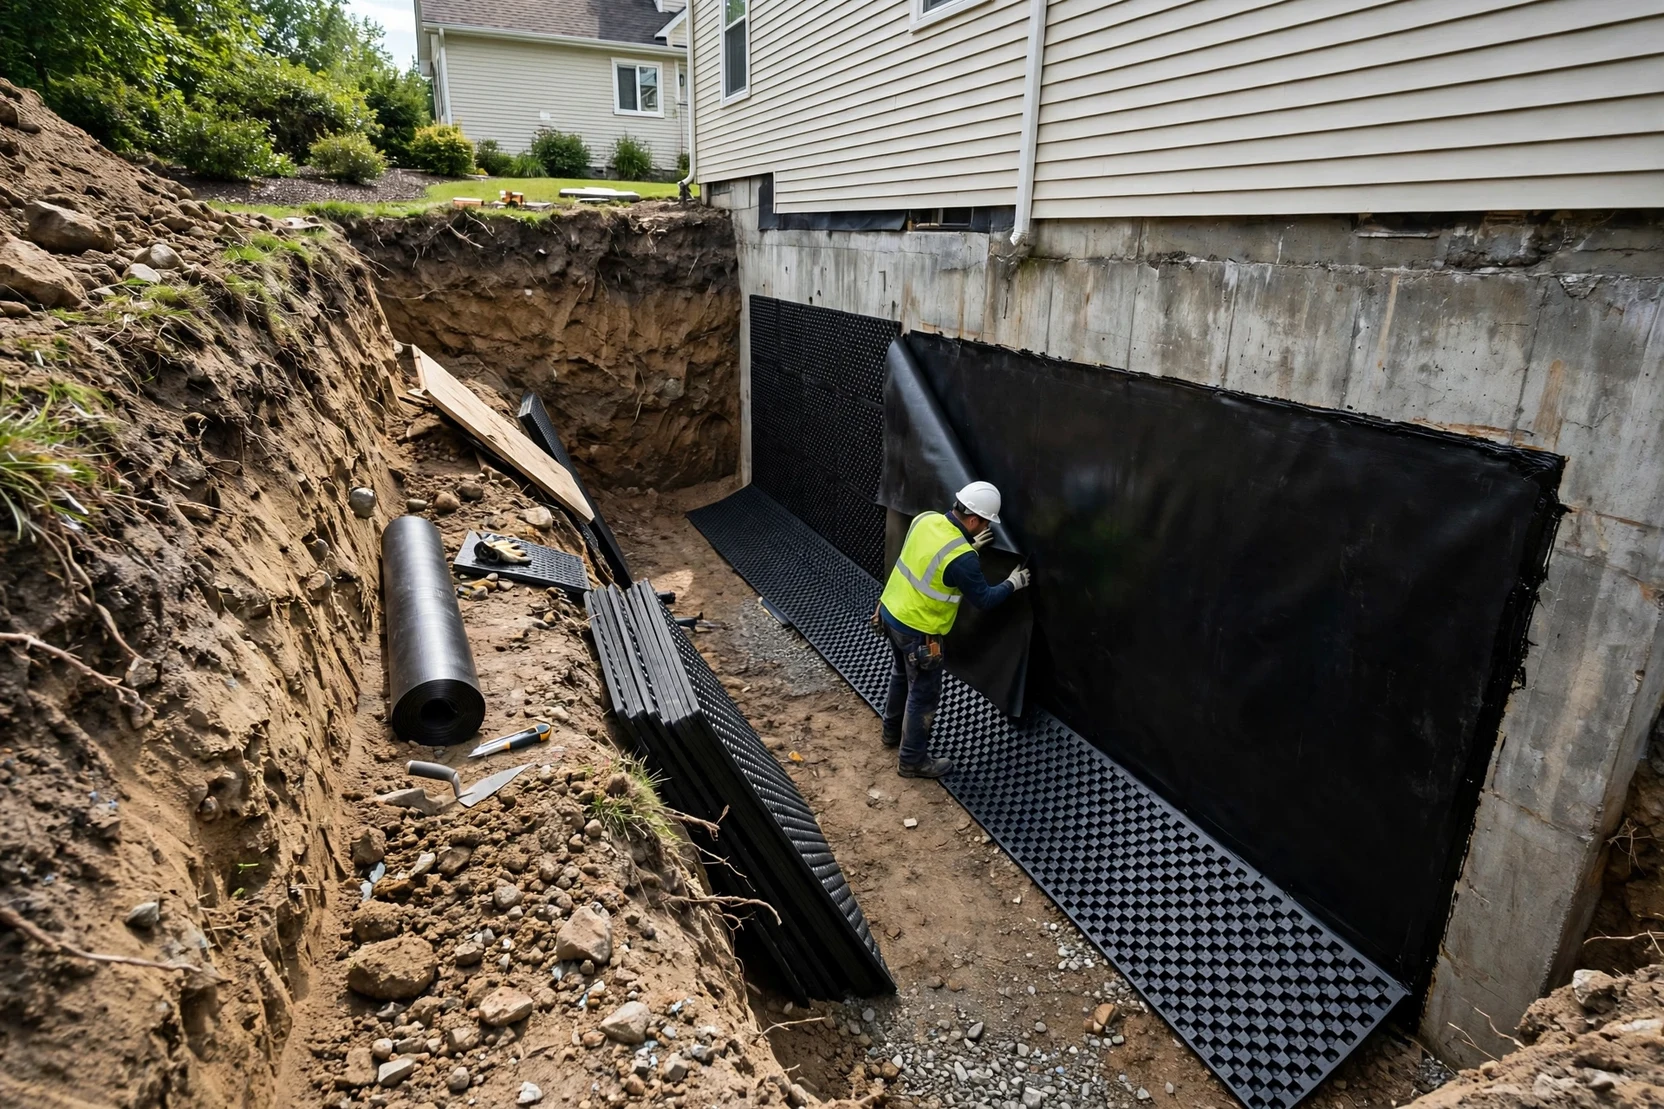
Excavation means digging around the exterior of the foundation to the footing. A crew power washes the wall, repairs defects, and applies a waterproof coating or membrane to the outside of the wall. A protection board goes over the membrane before backfill. The board protects the membrane and gives water a path down to the footing drain.
Exterior basement waterproofing starts at the footing, not at the paint can. UltraTech Cement calls exterior waterproofing the most reliable and long-lasting solution for preventing water infiltration. Blue Umbrella Waterproofing gives a range for existing homes: $20,000 to $40,000 or more, because excavation and labor are heavy, and decks, walkways, patios, driveways, and HVAC units often need removal first. SensibleDigs gives a lower range, about $8,000 to $15,000, and the difference comes from scope, depth, access, and restoration work.
Exterior French Drains
An exterior French drain is a trench filled with gravel and a perforated pipe that collects water and moves it away from the foundation. The trench intercepts groundwater before it presses on the wall. The pipe carries water to daylight or to a sump.
SensibleDigs gives a DIY version for a shallow exterior curtain drain. Dig a trench about 18 inches deep and 9 to 12 inches wide, with a slope of at least 1 percent, a 1-inch drop for every 8 feet. Line the trench with fabric, add washed gravel, lay perforated pipe with holes facing down, cover it with gravel, fold the fabric over the top, and finish with soil. Do not use limestone, because it breaks down and clogs the pipe. Use washed granite or river rock.
Exterior drains need an outlet. A drain with nowhere to go fills up and stops working. Basement Systems warns that exterior drains are prone to clogging. Route the drain to daylight or to a sump.
Grading, Gutters, and Downspouts
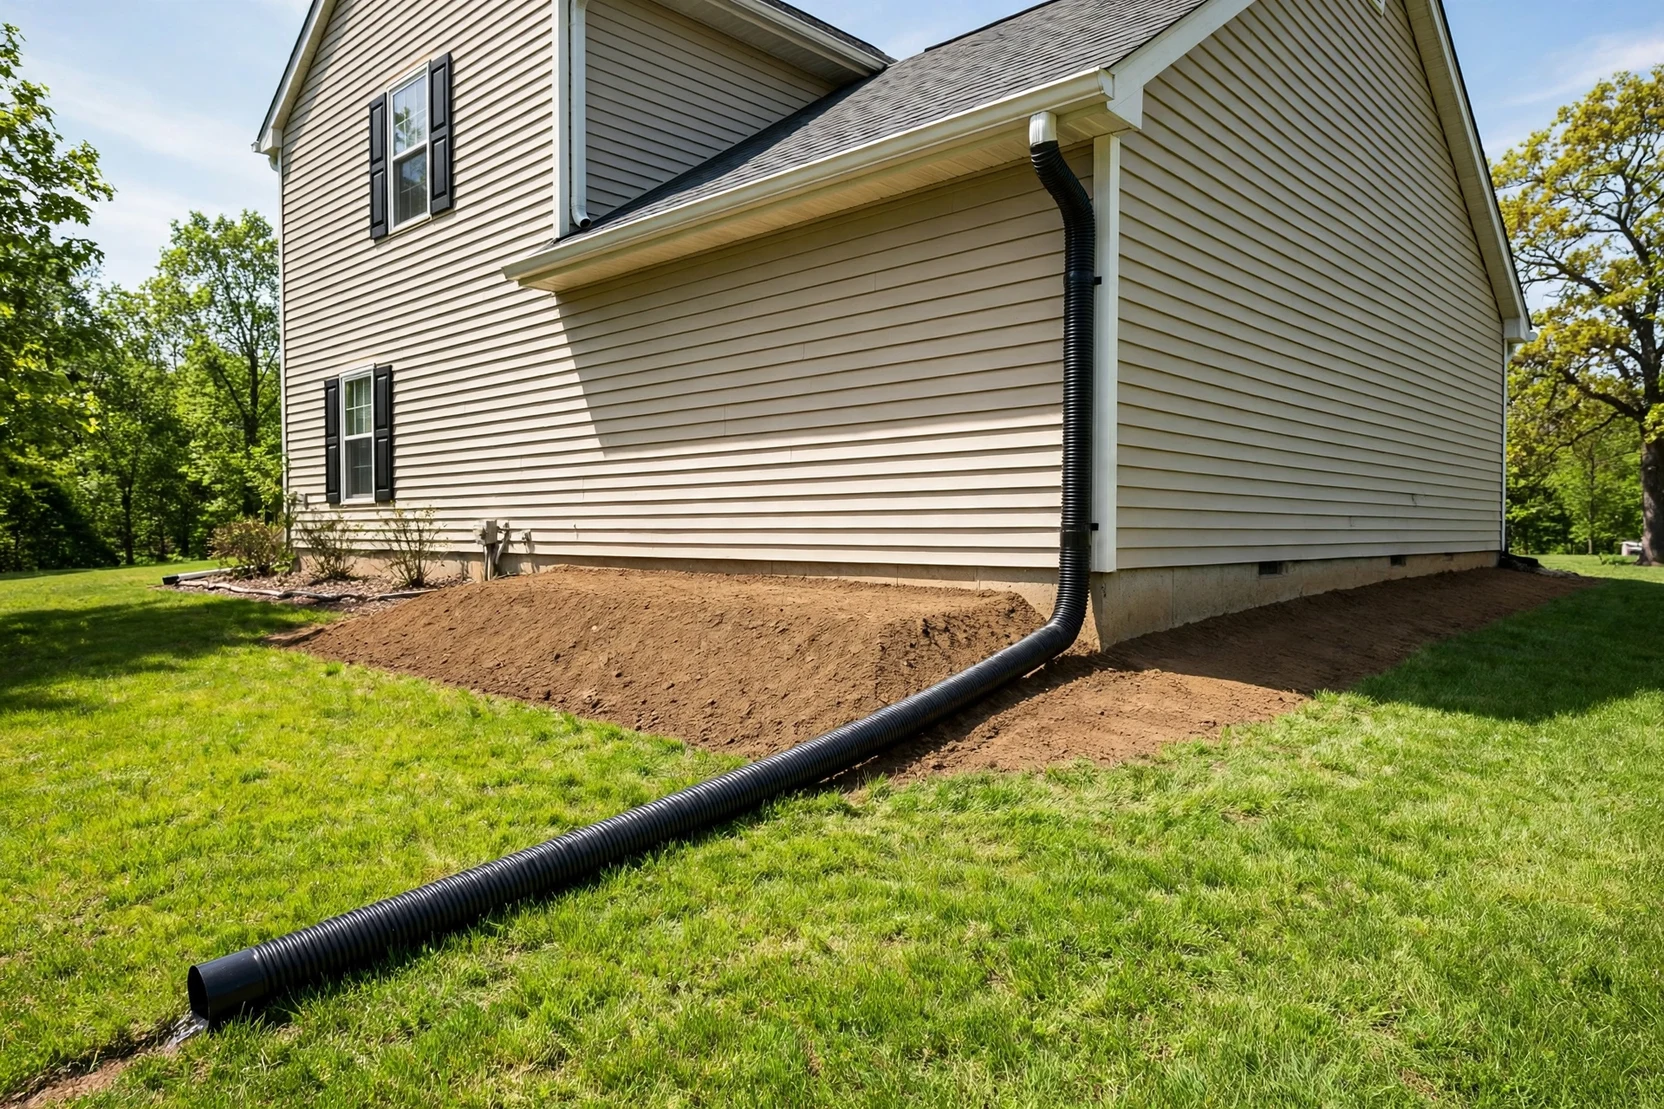
Grading, gutters, and downspouts are the cheapest exterior methods, and they belong first in every plan. Proper grading ensures the ground slopes away from the foundation and stops water from pooling around basement walls. Even if you plan an interior drain, do not skip the basics outside.
Use these 3 targets. Soil should drop about 6 inches over the first 10 feet away from the foundation, about a 5 percent slope, per Building America guidance cited by SensibleDigs and Grit and Home. Downspouts should discharge at least 4 to 6 feet from the foundation, and 8 to 10 feet where the yard allows. Clean gutters so water does not overflow at the foundation line. Fill low spots near the foundation.
Window wells need the same care. A window well that fills up sends water straight inside. Check that the well has a gravel base and a drain, and add a clear cover if the well fills during storms.
Basement Waterproofing Methods Compared: Interior vs Exterior
Interior methods manage water after it enters the foundation, and exterior methods stop water before it enters the wall, and the right choice depends on access, water volume, and whether the house is new or existing. Interior work costs less and disrupts less, and exterior work lasts longer at the wall but needs excavation.
| Factor | Interior methods | Exterior methods |
|---|---|---|
| Stops water at the wall | No, water reaches the wall, then drains away | Yes, membrane blocks entry at the wall |
| Typical disruption | Floor trench, dust, 2 to 4 days of work in the room | Full excavation, landscaping, decks, and driveways removed |
| Depends on power | Yes, sump pump needs power and a backup | No, membrane and drains work without power |
| Best for | Existing homes, finished basements, tight lots | New construction, severe groundwater, repeated wall leaks |
| Main limit | Pump failure or power cut stops removal | Cost, access, and clogging in exterior drains |
| Maintenance | Test pump monthly, clean pit, check backup | Check outlet, keep grade and gutters clear |
Waterproofing a basement exterior is the only method the United States International Building Code recognizes as adequate to prevent structural damage caused by water intrusion, per Wikipedia. That fact does not make exterior work right for every house. A house with a driveway, deck, and patio around 3 sides has no cheap way to dig. A house with a high water table may need both systems.

How Much Does Basement Waterproofing Cost?
Basement waterproofing costs range from low-cost DIY exterior work to $8,000 to $15,000 for exterior excavation and membrane work, per SensibleDigs, and an interior French drain with a sump pump averages about $3,000 to $8,000 installed, with a sump pump on its own running $600 to $2,500.
| Method | Typical installed cost | DIY or pro | Best for |
|---|---|---|---|
| Gutter cleaning and downspout extensions | Low, materials only | DIY | Roof runoff at the foundation |
| Regrading soil | Low to medium, varies by yard size | DIY or pro | Surface water pooling near the house |
| Hydraulic cement and crack injection | Low to medium, varies by crack length | DIY for small cracks, pro for structural cracks | Single cracks that leak in rain |
| Interior sealants and coatings | Low, materials only | DIY | Dampness through porous concrete |
| Interior French drain and sump pump | About $3,000 to $8,000, per SensibleDigs | Pro | Water rising through the floor |
| Sump pump alone | $600 to $2,500, per SensibleDigs | Pro | Standing water in the pit |
| Exterior membrane and excavation | About $8,000 to $15,000, per SensibleDigs; $20,000 to $40,000 or more for full excavation with restoration, per Blue Umbrella | Pro | Severe groundwater, new construction |
| Vapor barrier and encapsulation | Medium, varies by wall area | Pro | Finished basements |
Basement waterproofing methods vary in price by scope, not by leak severity alone. Compare scopes before you compare prices. A $8,000 exterior job and a $40,000 exterior job are not the same job. Ask each contractor for membrane type, drain type, discharge point, backfill material, grading after backfill, and warranty terms.
What Should You Do About Humidity and Mold After a Leak?
After a leak, dry the basement in the first 24 to 72 hours, remove wet porous materials, run a dehumidifier, and keep indoor humidity below 60 percent, ideally between 30 and 50 percent, per the EPA as cited by Luxcando. Mold grows on materials that stay damp, and drying fast plus fixing the water source stops most regrowth.
Grit and Home gives a dry-out checklist for the first 24 to 72 hours. Remove wet cardboard, carpet padding, damaged drywall, and insulation quickly if the material cannot dry fully. Move air with box fans aimed across wet surfaces. Run a dehumidifier hard and set it to 45 to 50 percent relative humidity. Check hidden areas behind baseboards and under laminate near the leak.
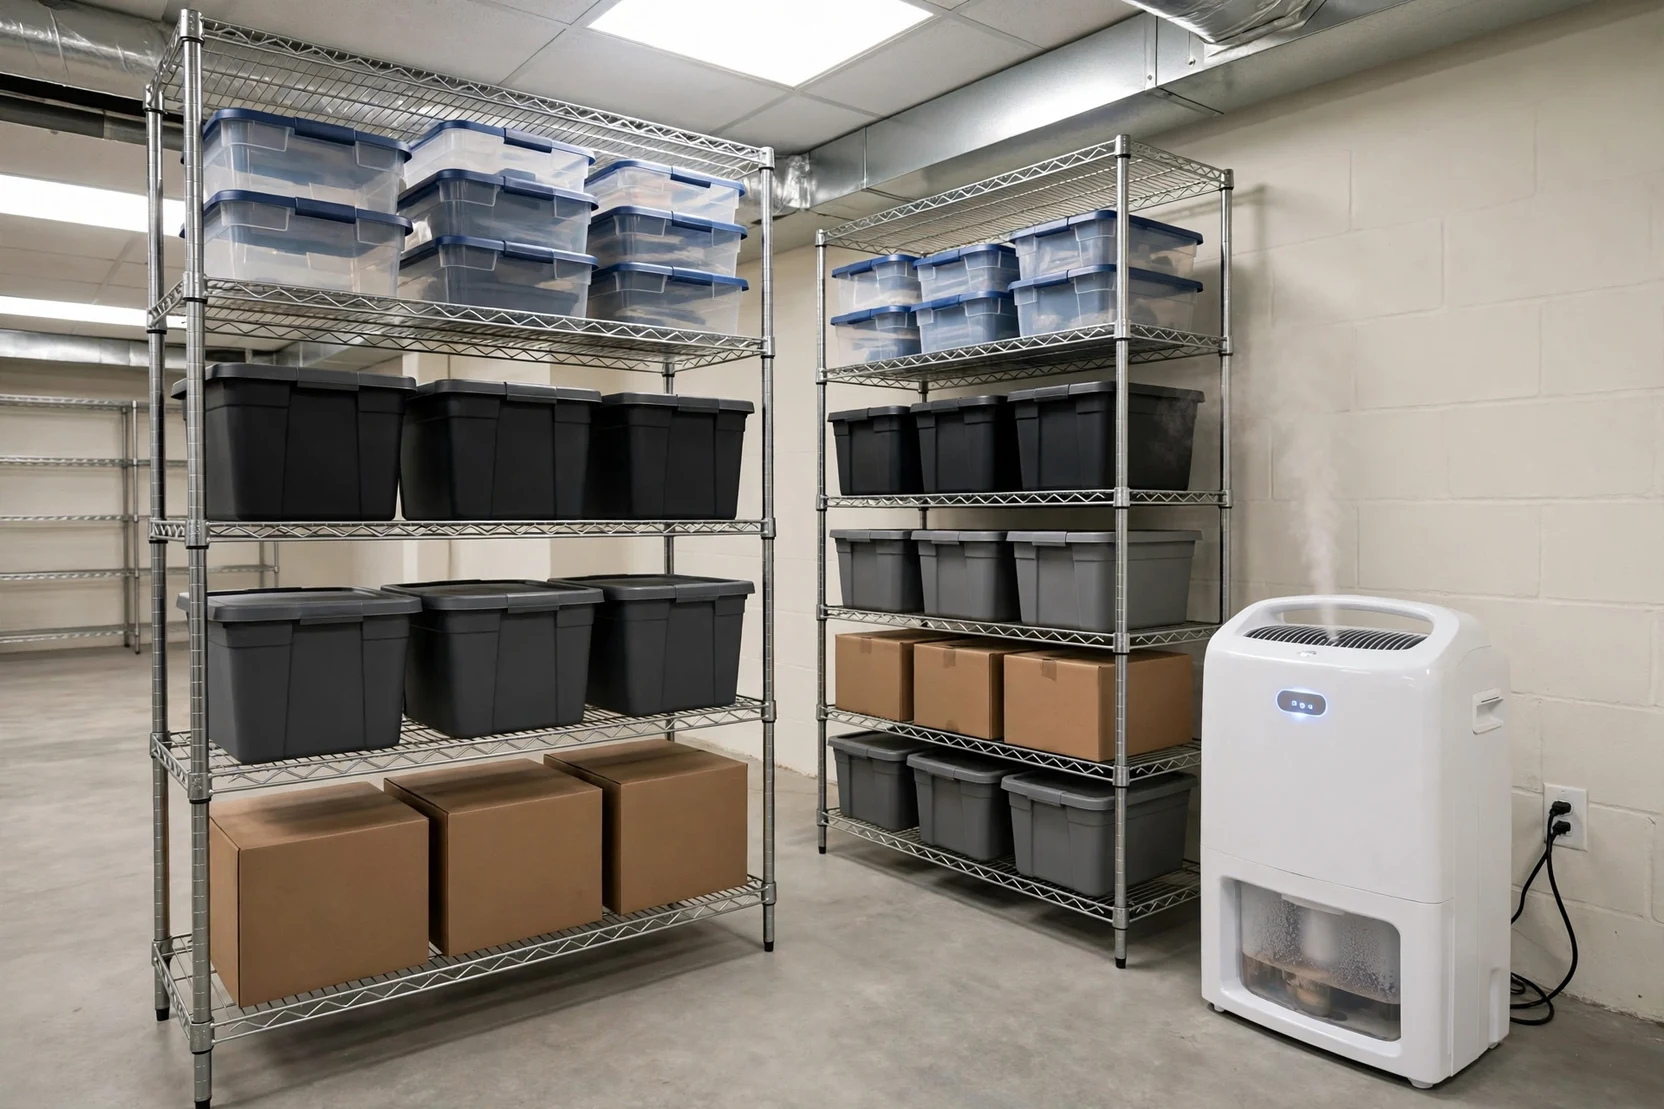
A dehumidifier lowers humidity in the air, but it does not stop water from entering through walls, cracks, or the floor. Use a dehumidifier as the final step in a waterproofed basement, once leaks are addressed. Empty the tank or keep the drain line clear. Insulate cold water pipes to cut condensation. Keep storage off the floor on shelving or pallets.
Treat standing water as an electrical hazard. Shut off power to the basement if you can do it safely. Wear gloves and eye protection. If water contacted sewage, treat it as contaminated.
When Should You Call a Waterproofing Professional?
Call a waterproofing professional when a crack is wider than a pencil, a wall bows or shifts, water floods repeatedly, a sump pump runs constantly, or the fix needs excavation or cutting the floor slab. Those 5 signs point to structural risk, high water volume, or equipment that a DIY repair cannot address safely.
SensibleDigs draws the DIY line at excavation and structural repair. Interior sealing, crack filling, gutter cleaning, downspout extensions, and regrading are weekend jobs with hand tools. Structural cracks wider than a pencil, a bowing wall, or cutting the floor slab belongs to a contractor.
Get 3 quotes for pro work. Ask each contractor to name the water source, not just the product. Ask for the discharge point, the backup plan for power cuts, and the warranty in writing. A contractor who sells a product before naming the source is selling, not diagnosing.
Conclusion
A dry basement starts with diagnosis, not with a product. Basement waterproofing methods reward diagnosis first. Walk the basement after rain, run the foil test, and log the pattern. Fix gutters, downspouts, and grading first. Seal cracks next. Add interior drainage and a reliable sump pump if water rises through the floor. Reserve exterior excavation for new construction, severe groundwater, or structural work that already needs digging. Test the pump monthly, keep humidity below 60 percent, and keep the discharge point clear. Those 5 habits keep a basement dry year after year, and they cost less than 1 flooded finished room.
FAQs

Related Posts